Yet another Raspberry Pi Cyberdeck
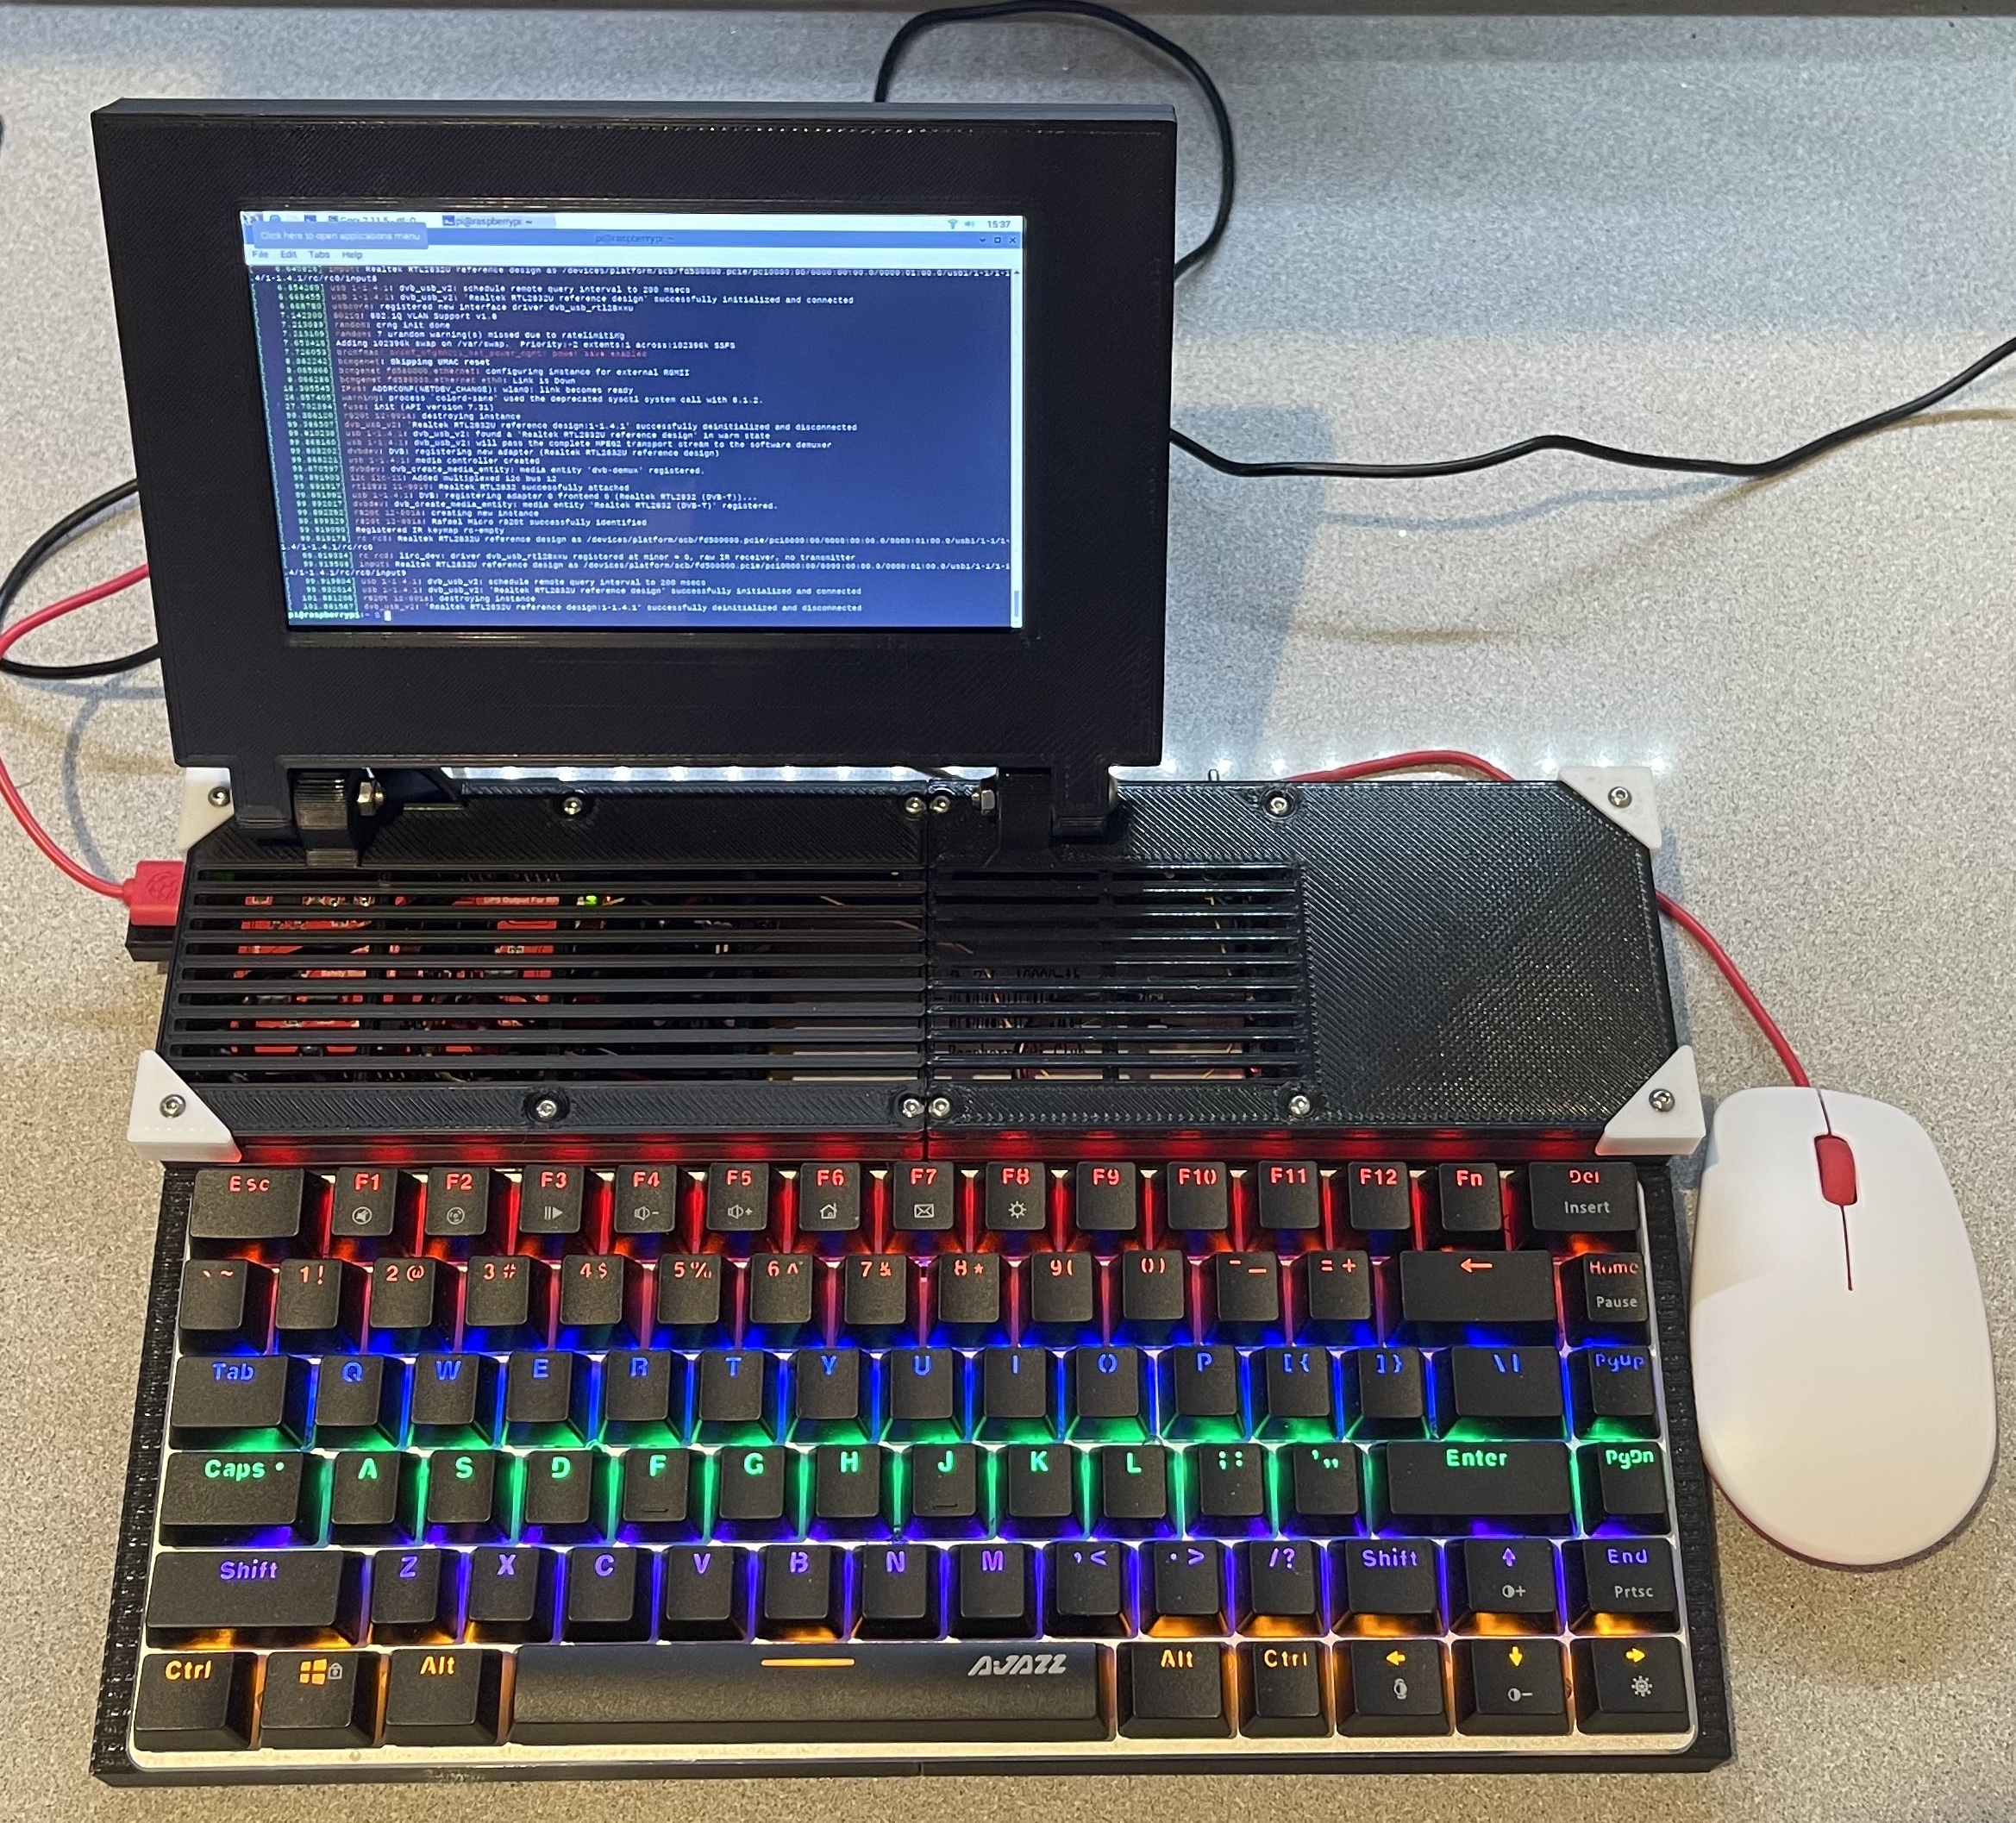
If you are a regular reader of blogs like hackaday, then you will have noticed in recent years that ‘cyberdecks’ have become quite popular.
Most of these are essentially custom designed/built laptops based around various SBCs, with the Rapsberry Pi being a popular choice. Some of them use Intel NUCs or other PC hardware, some even feature head mounted displays!
They generally have a retro-futuristic, hand-built, utilitarian aesthetic. Cyberdecks often feature in cyberpunk books, movies, video games, etc.
First Attempts
I love the design of these, and over the last year or so I have experimented with the idea of building my own. I have even done a few prototypes or builds that I never finished or discarded for some reason. They were all based largely around the same hardware.
My first go was a laser-cut acrylic design, this was before I purchased a 3D printer. I used the laser cutter at my local hackspace.
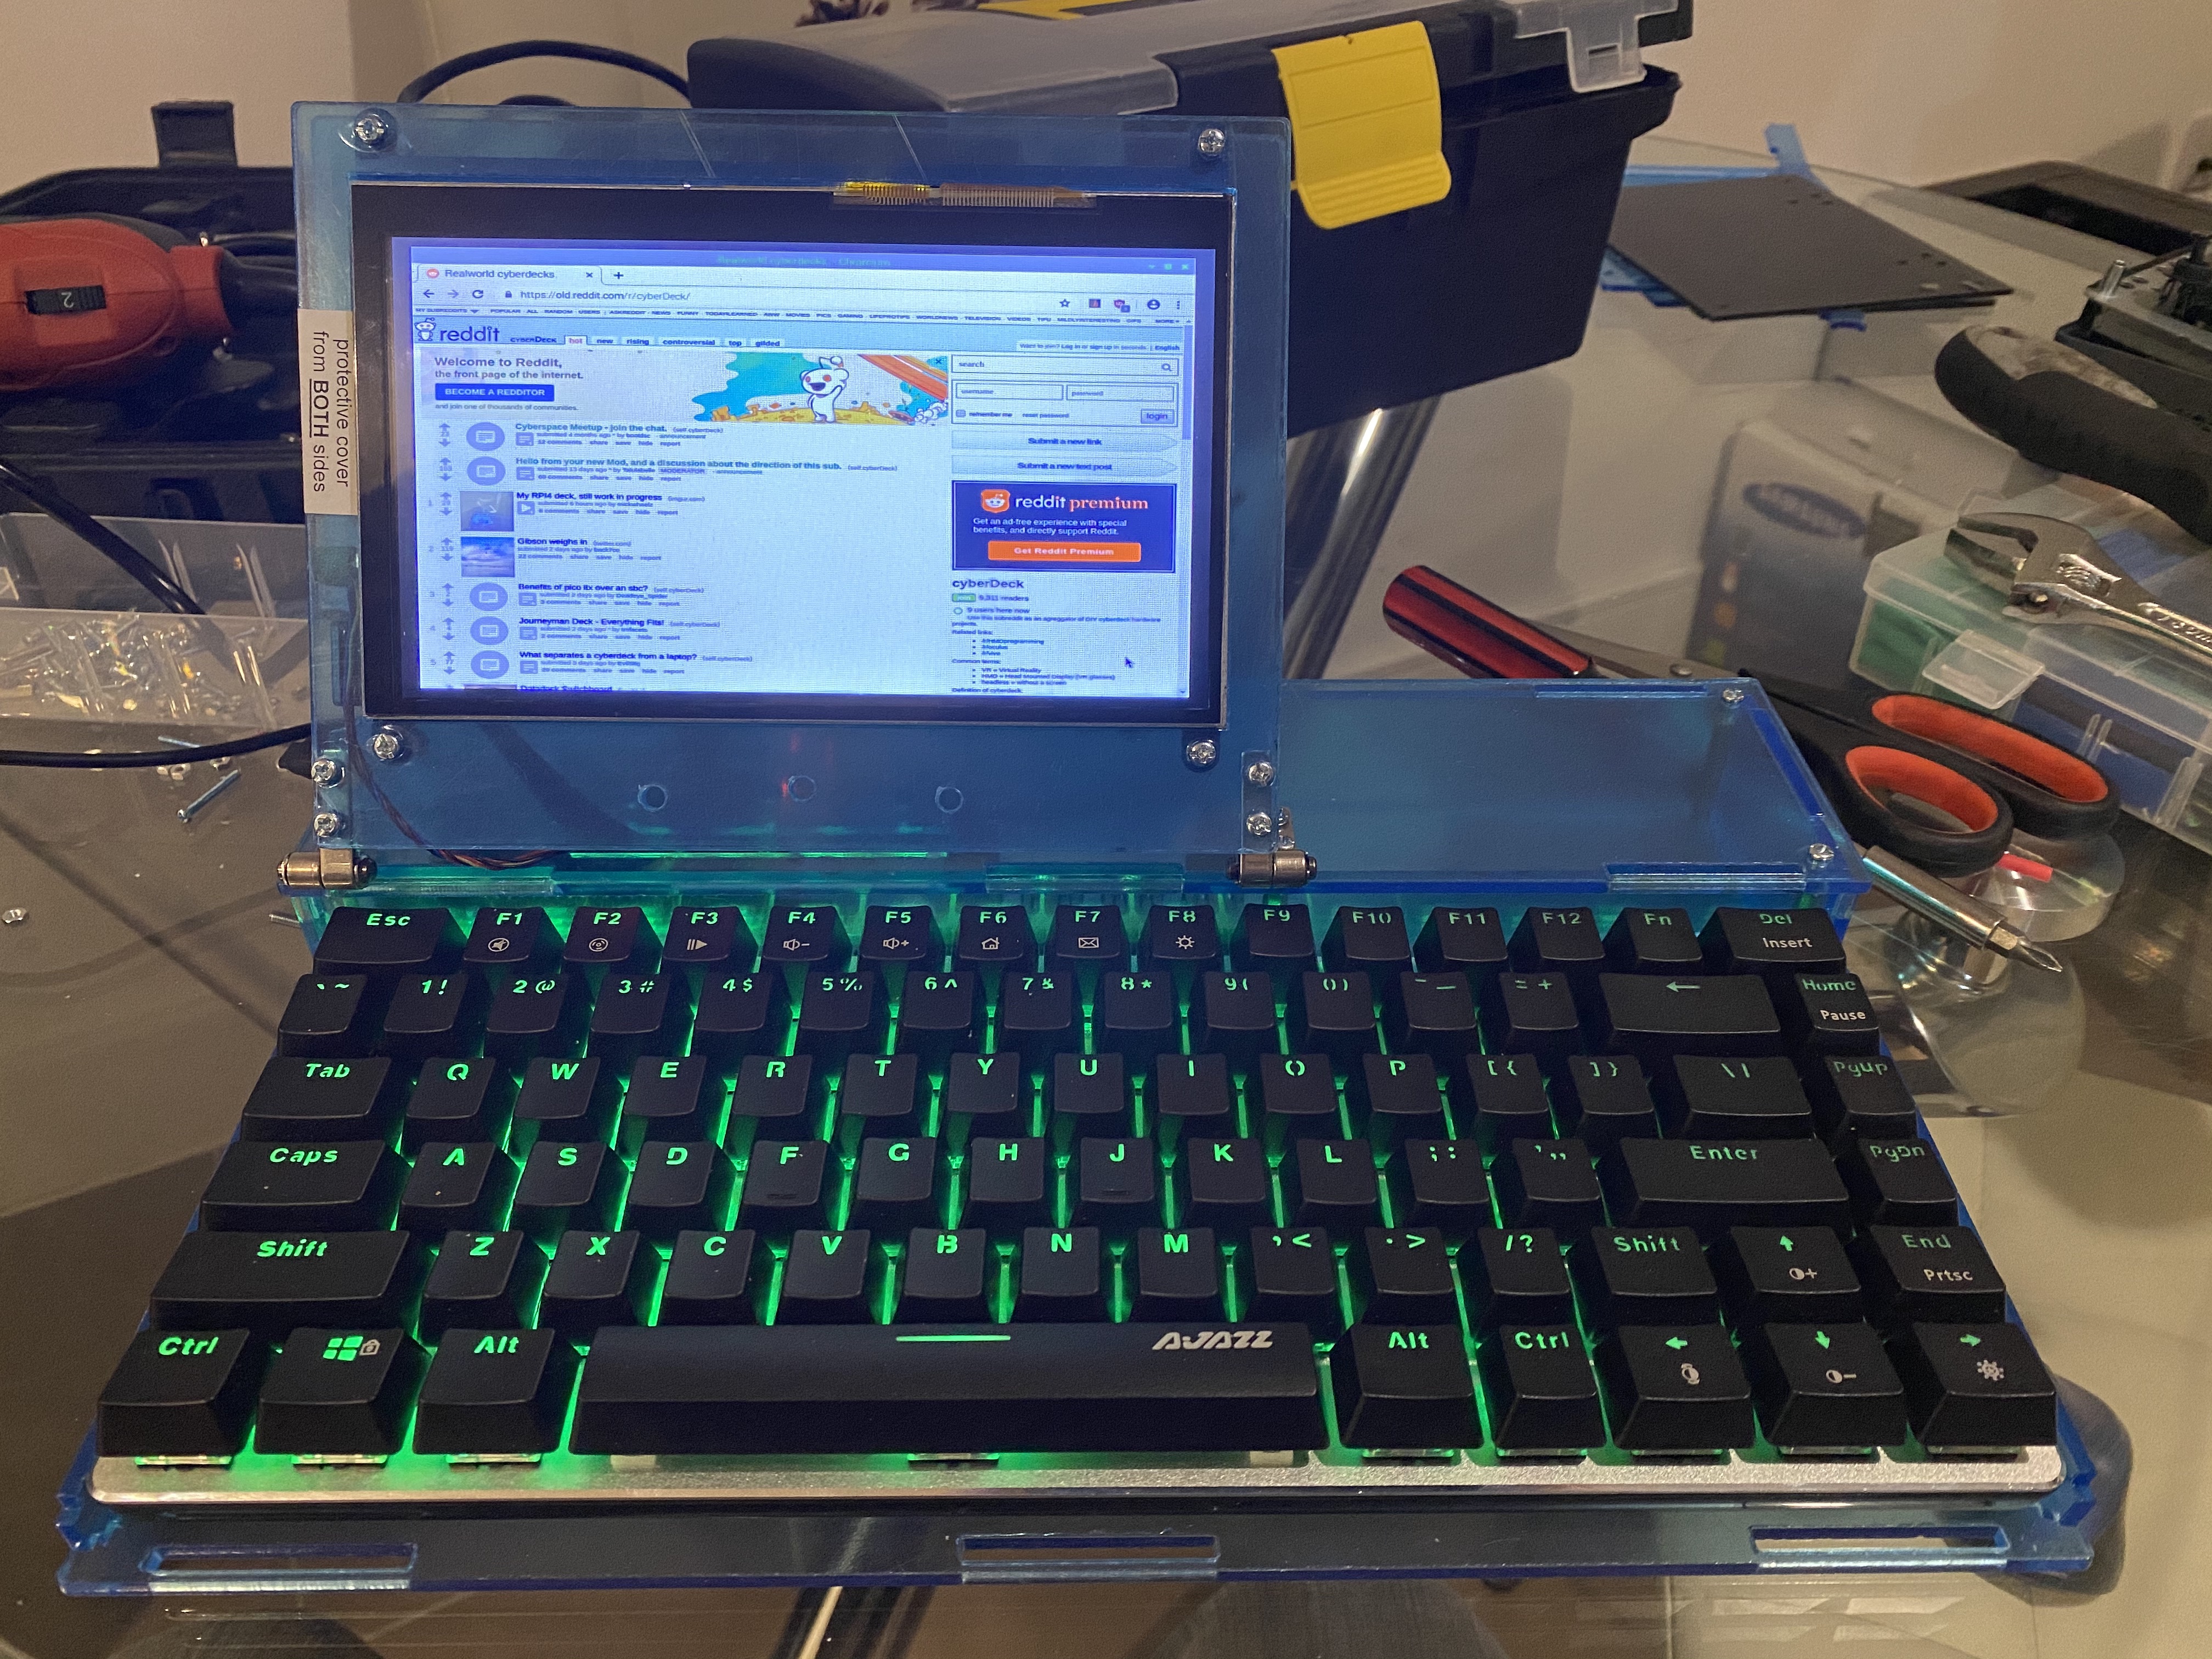
It was a thing, it worked but I didn’t like the design or assembly.
It was based around a Raspberry Pi 4, 7" LCD touchscreen and a ‘AK33’ mechanical keyboard.
I abandoned this design pretty early on, it was a pain to put together and I wasn’t happy with how it looked.
A while later, I bought a 3d printer (Ender 3 Pro) and set about designing my next attempt.
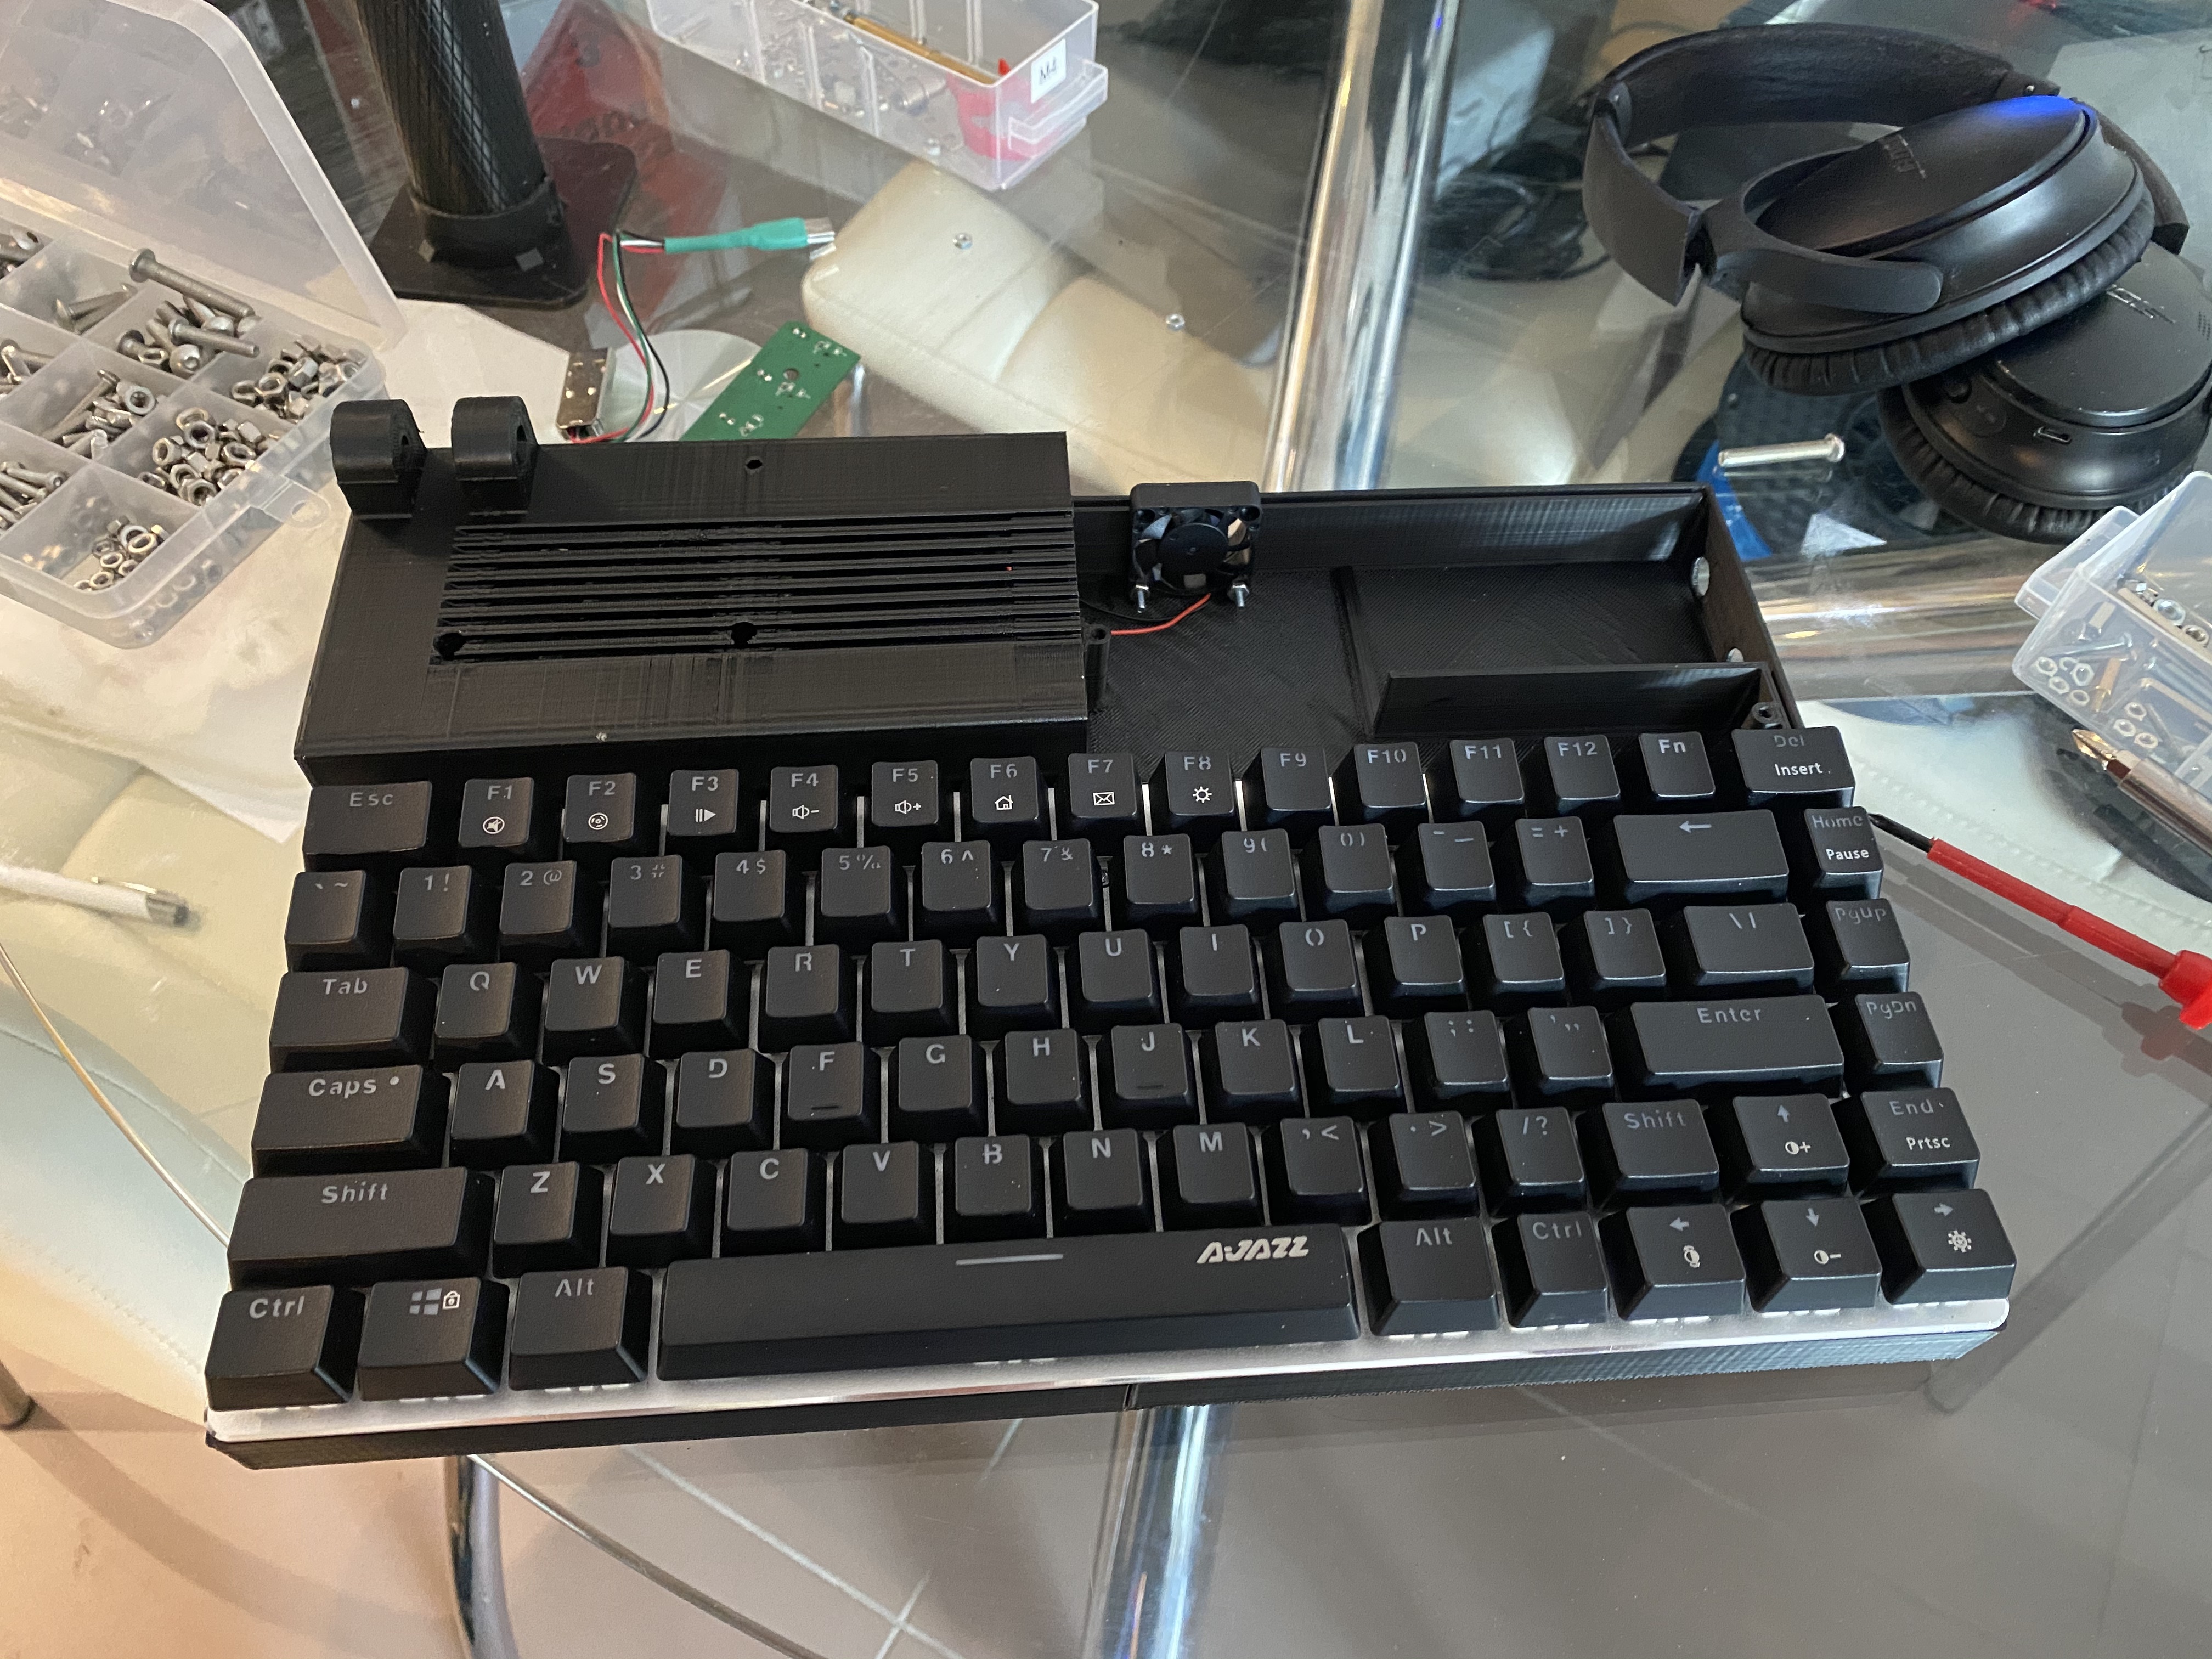
This one was much better, but I still wasn’t happy.
This one used the same hardware, and I was sort-of happy with it, but I could never get the keyboard to sit right and it was a pain to print, so I gave up on this design.
Current ‘Attempt’

Here it is, in all its glory!
Over the Christmas break, inspired by 100+ hours of Cyberpunk 2077 (Which, I loved, to spite its flaws) I thought I’d have another go at this whole cyberdeck thing.
My 3D modeling skills are slightly better than when I made the first attempt (though still very poor) so I hoped I’d have more success.
I wanted my cyberdeck to have certain features/qualities;
- It had to be portable, and able to run from a battery.
- I wanted to include an SDR in it, so it could be used as a portable listening station
- I wanted to use the same AK33 keyboard I had from the previous attempts
- I wanted it to be ‘clean’… e.g no cables hanging out, etc.
- I wanted it to be easy to put together.
With those goals in mind, I fired up Fusion360, a piece of software with which I have a love hate relationship and set to work.
Design
I went with largely the same aesthetic as the first 3D printed attempt. Sort of inspired by the Amiga 600 or Commodore 64C and other similar machines, but with a screen on top.
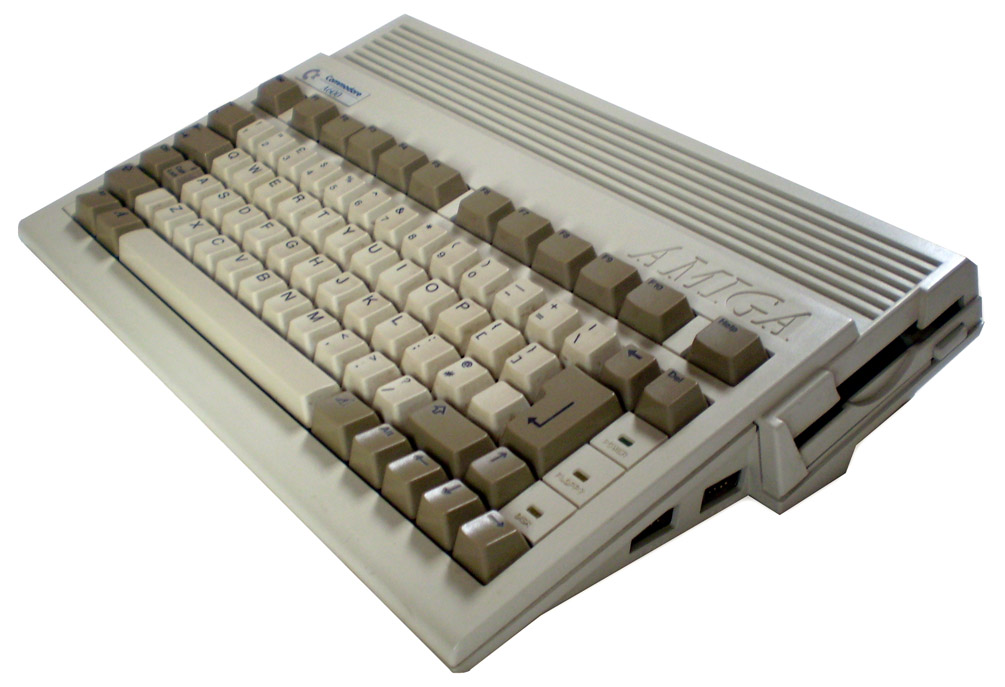
If you squint hard, it almost looks like one! (Image from Wikipedia)
With the design somewhat laid out in my head, I started drawing. I split the machine in to 4 main sections, so as to fit on my printers bed.
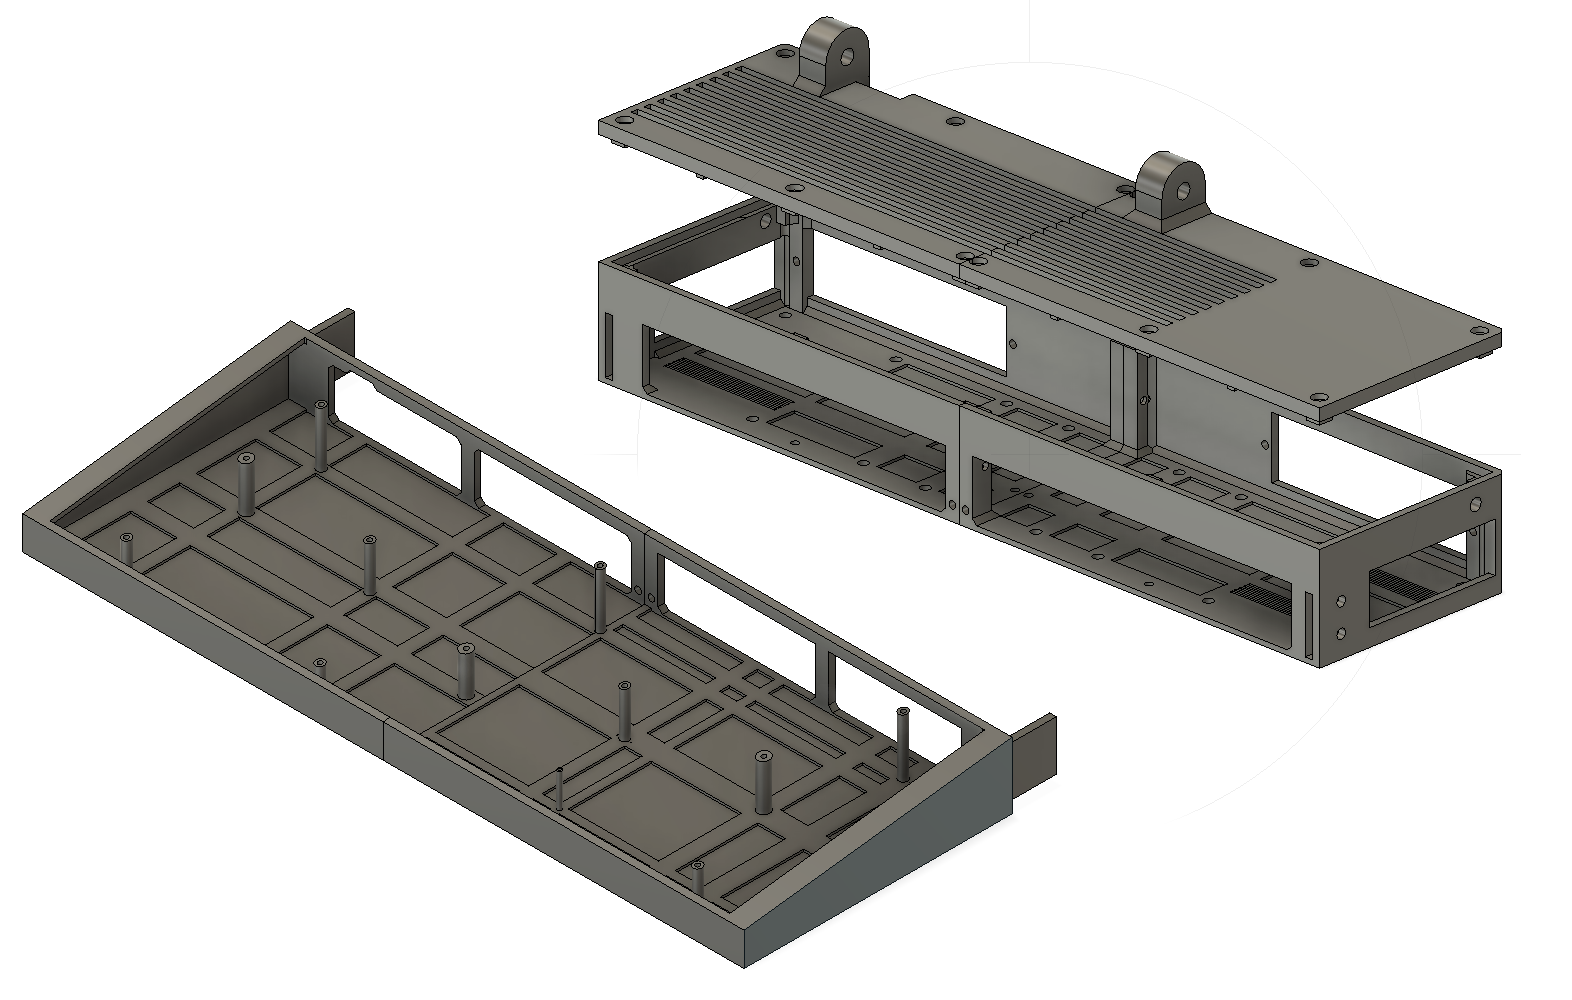
3D Models of the major components
The two rear sections contain most of the hardware, and are bolted together. On top go two slotted ’lids’ with the uprights for the display hinges.
The two front sections attach with tabs that slide in to the rear sections. They are also bolted in the middle.
The front sections only contain standoffs for they keyboard, but could easily hold additional hardware (there’s a bit of room underneath, especially towards the back.
You will notice the evenly-spaced holes in the bottom of the device. My idea was here that it would make it easy to add and remove hardware. Each device, like the Pi, USB Hub, etc is on a separate carrier that is bolted to the bottom of the board.
If you want to build your own, but are using slightly different hardware to me, all you need to do is design carriers for it, rather than changing the whole case.
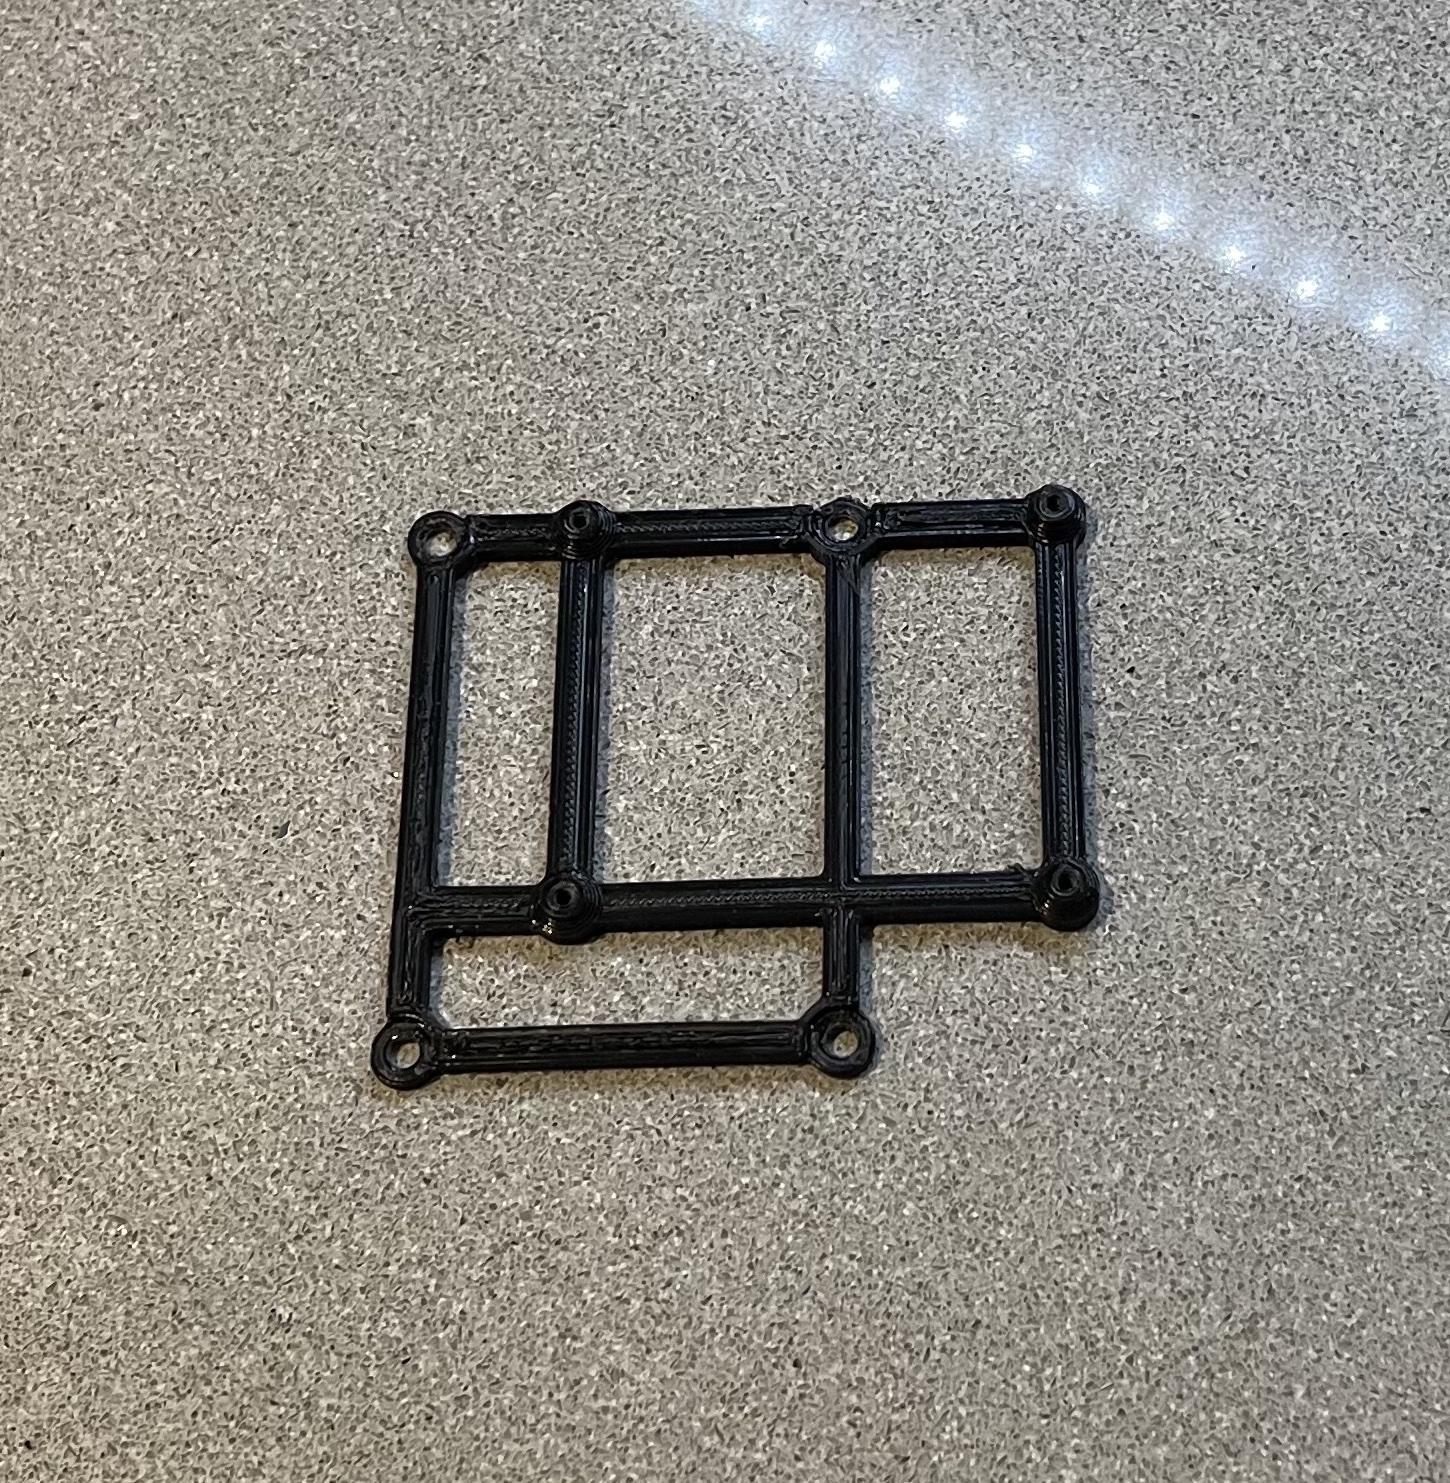
Quicker than re-printing the whole section!
It also made it much easier, as if I made a mistake on the hole spacing for the RPi, I only needed to re-print the carrier, not the whole device!
With all that in mind, let’s turn to the actual hardware in the cyberdeck.
Hardware
I am using largely the same hardware from my first attempts, but let’s look at it in a little more detail.
The SBC is a Raspberry Pi 4, 4Gb model. It currently has a 16Gb SD card, but I will be swapping that for a larger one.
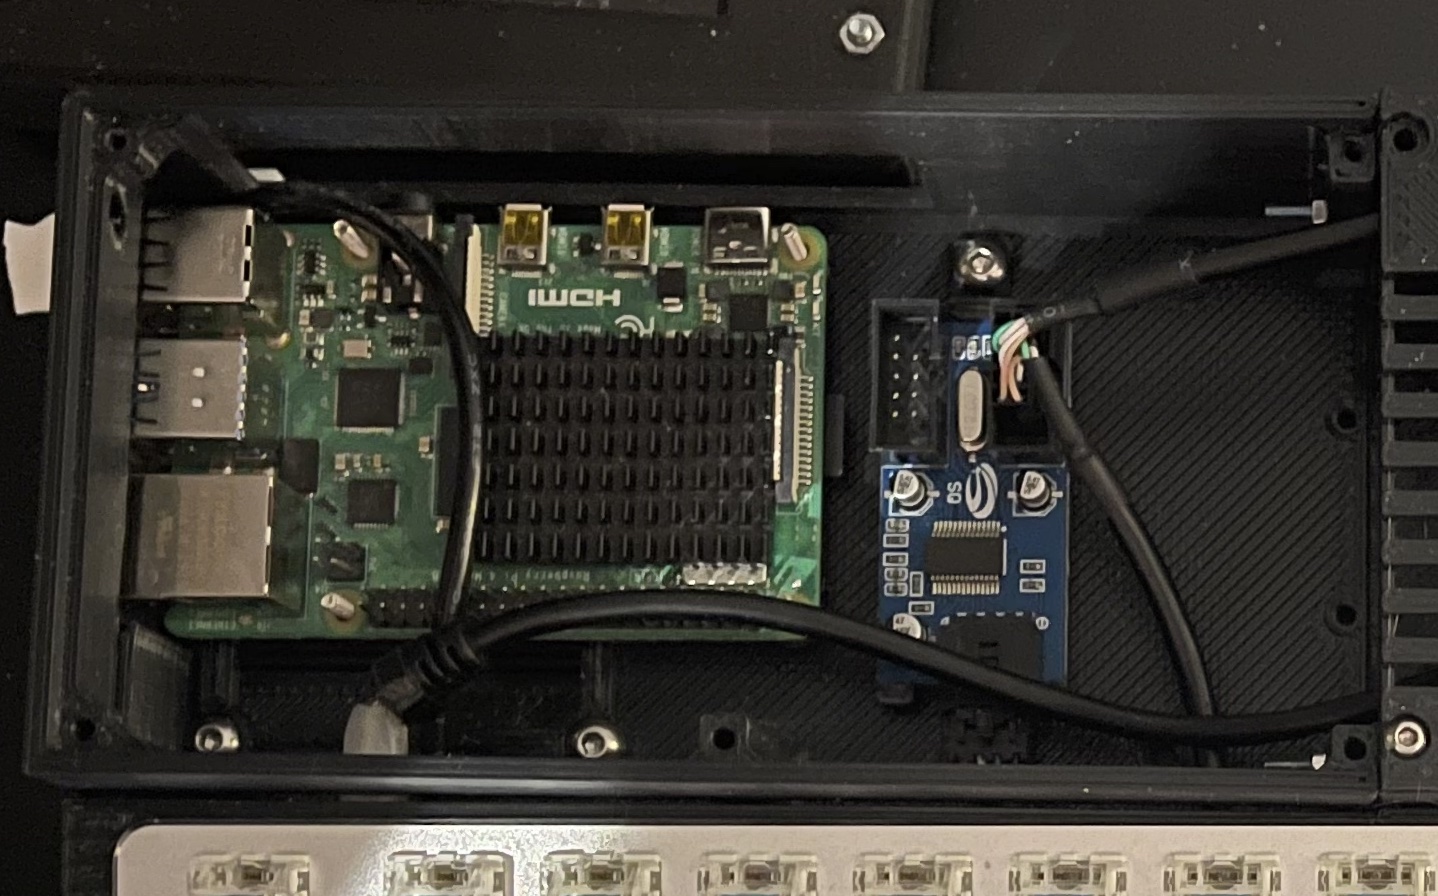
The Pi next to the USB Hub
On top of that, is a UPSPack V3. This is a cheap but feature rich UPS board for Raspberry Pi’s. It can do 5V, 3A output, report data to the Pi via serial (such as charge status) and shutdown the Pi gracefully before the battery runs out.
It handles charging via USB-C and has a pair of external (unused in my design) USB ports for powering other devices. I also soldered wires for an external switch that is mounted in the back panel of the cyberdeck.
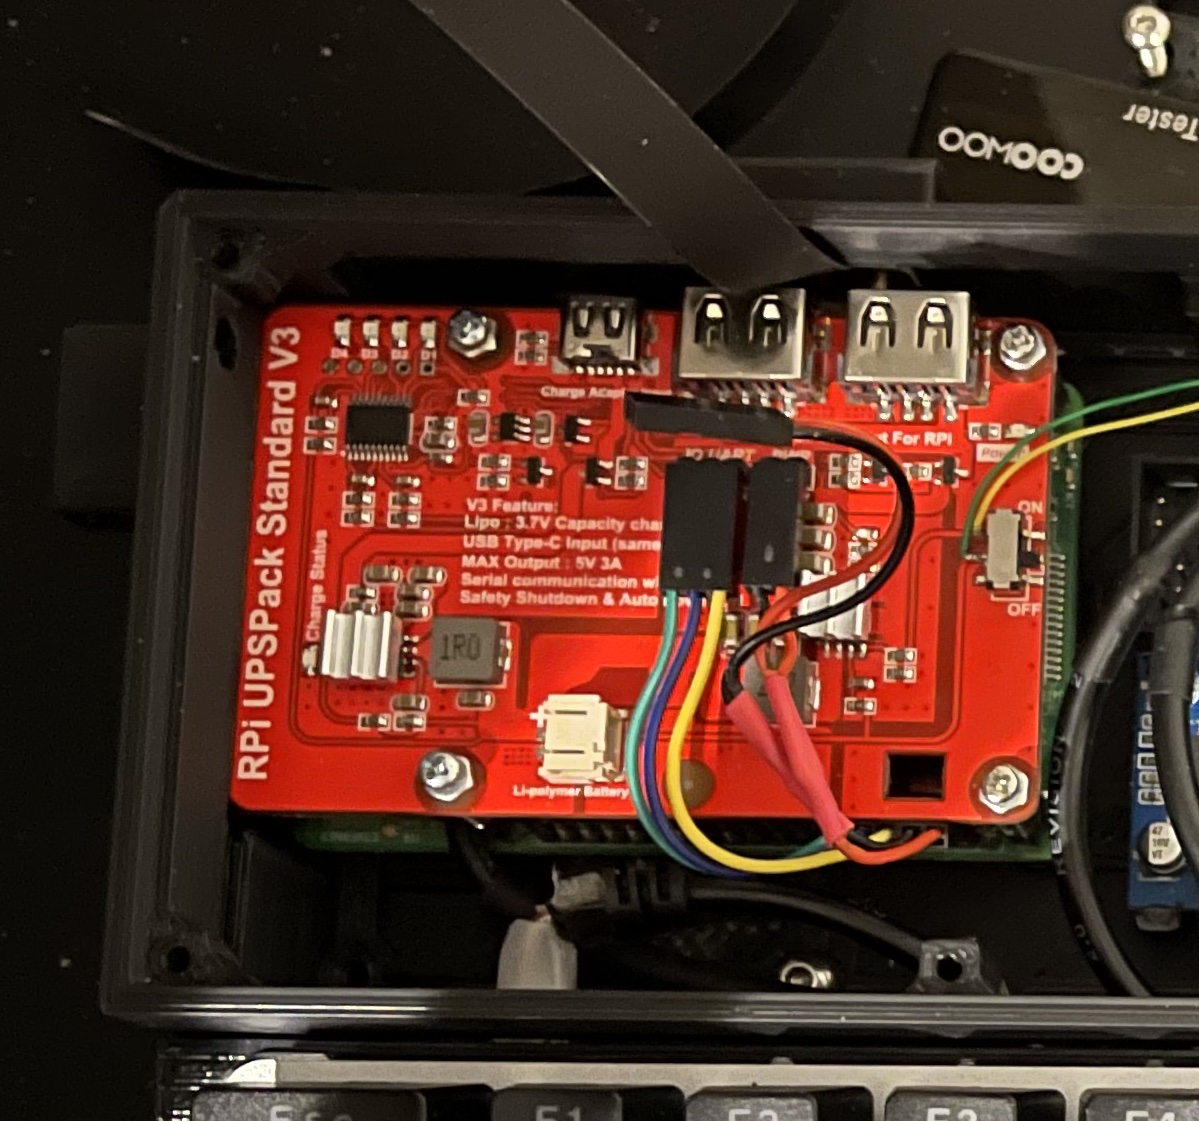
Stacked neatly on top of each other
Next to the Pi is an ‘internal’ USB hub, its designed for use in PCs for running things like RGB and Fan Controllers, but it was perfect for my application. It is a 4 port hub with standard USB headers like you’d find in any PC.
Update: I tested the battery life by running Chrome with a YouTube video playing and logging the uptime every 2s to a file. The result was 3h 40m of runtime.
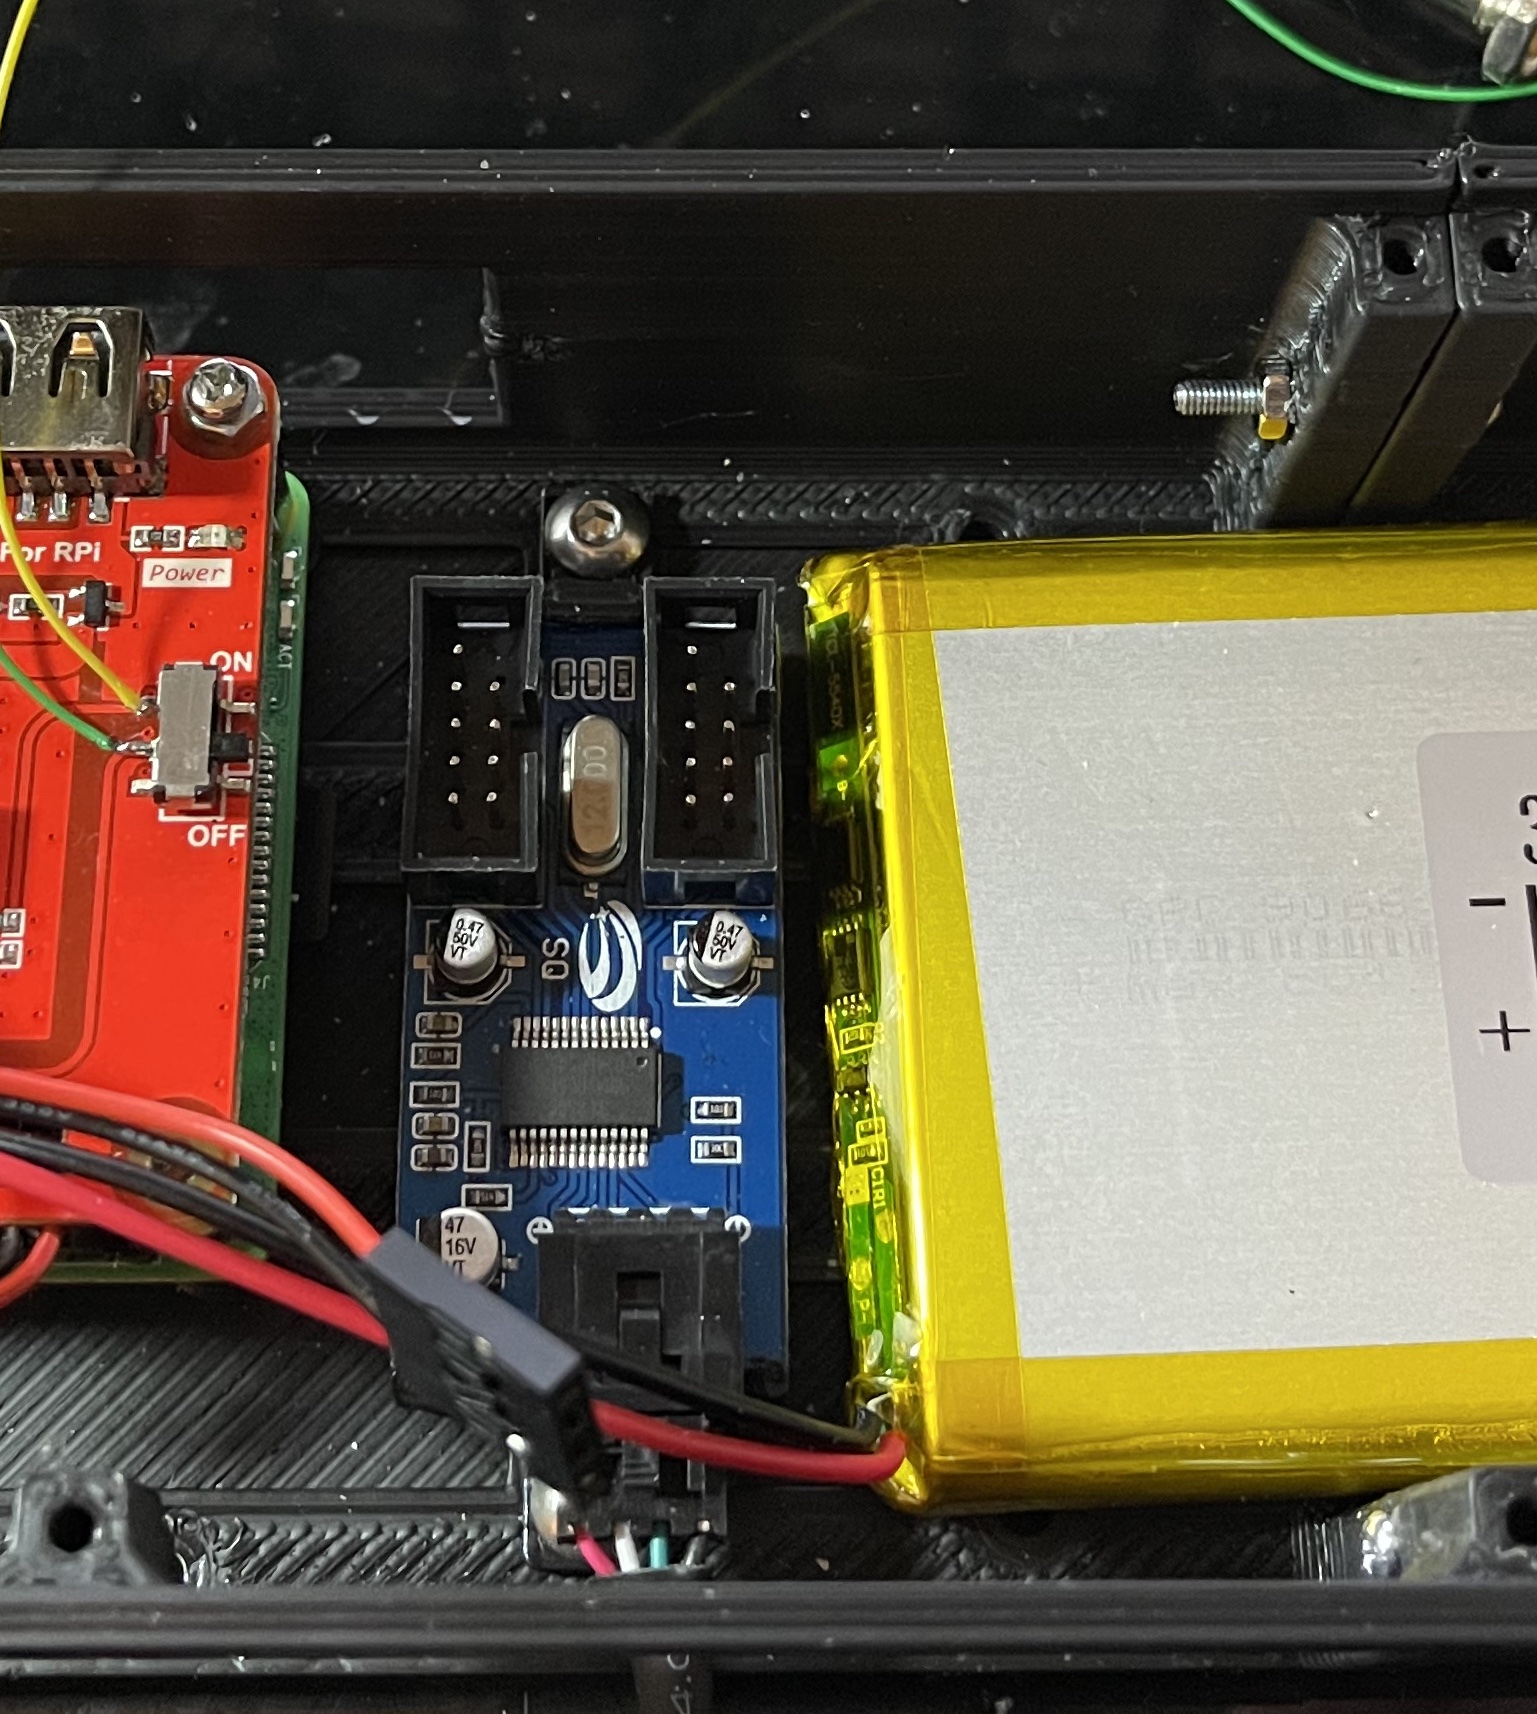
Nestled between the Pi and the battery
I attached a USB plug to its cable, which is plugged into the bottom USB2 port on the Pi, this whole mess is covered by a plate. I think I might change this design by soldering wires to the underside of the Pi and then just blanking the usb port.
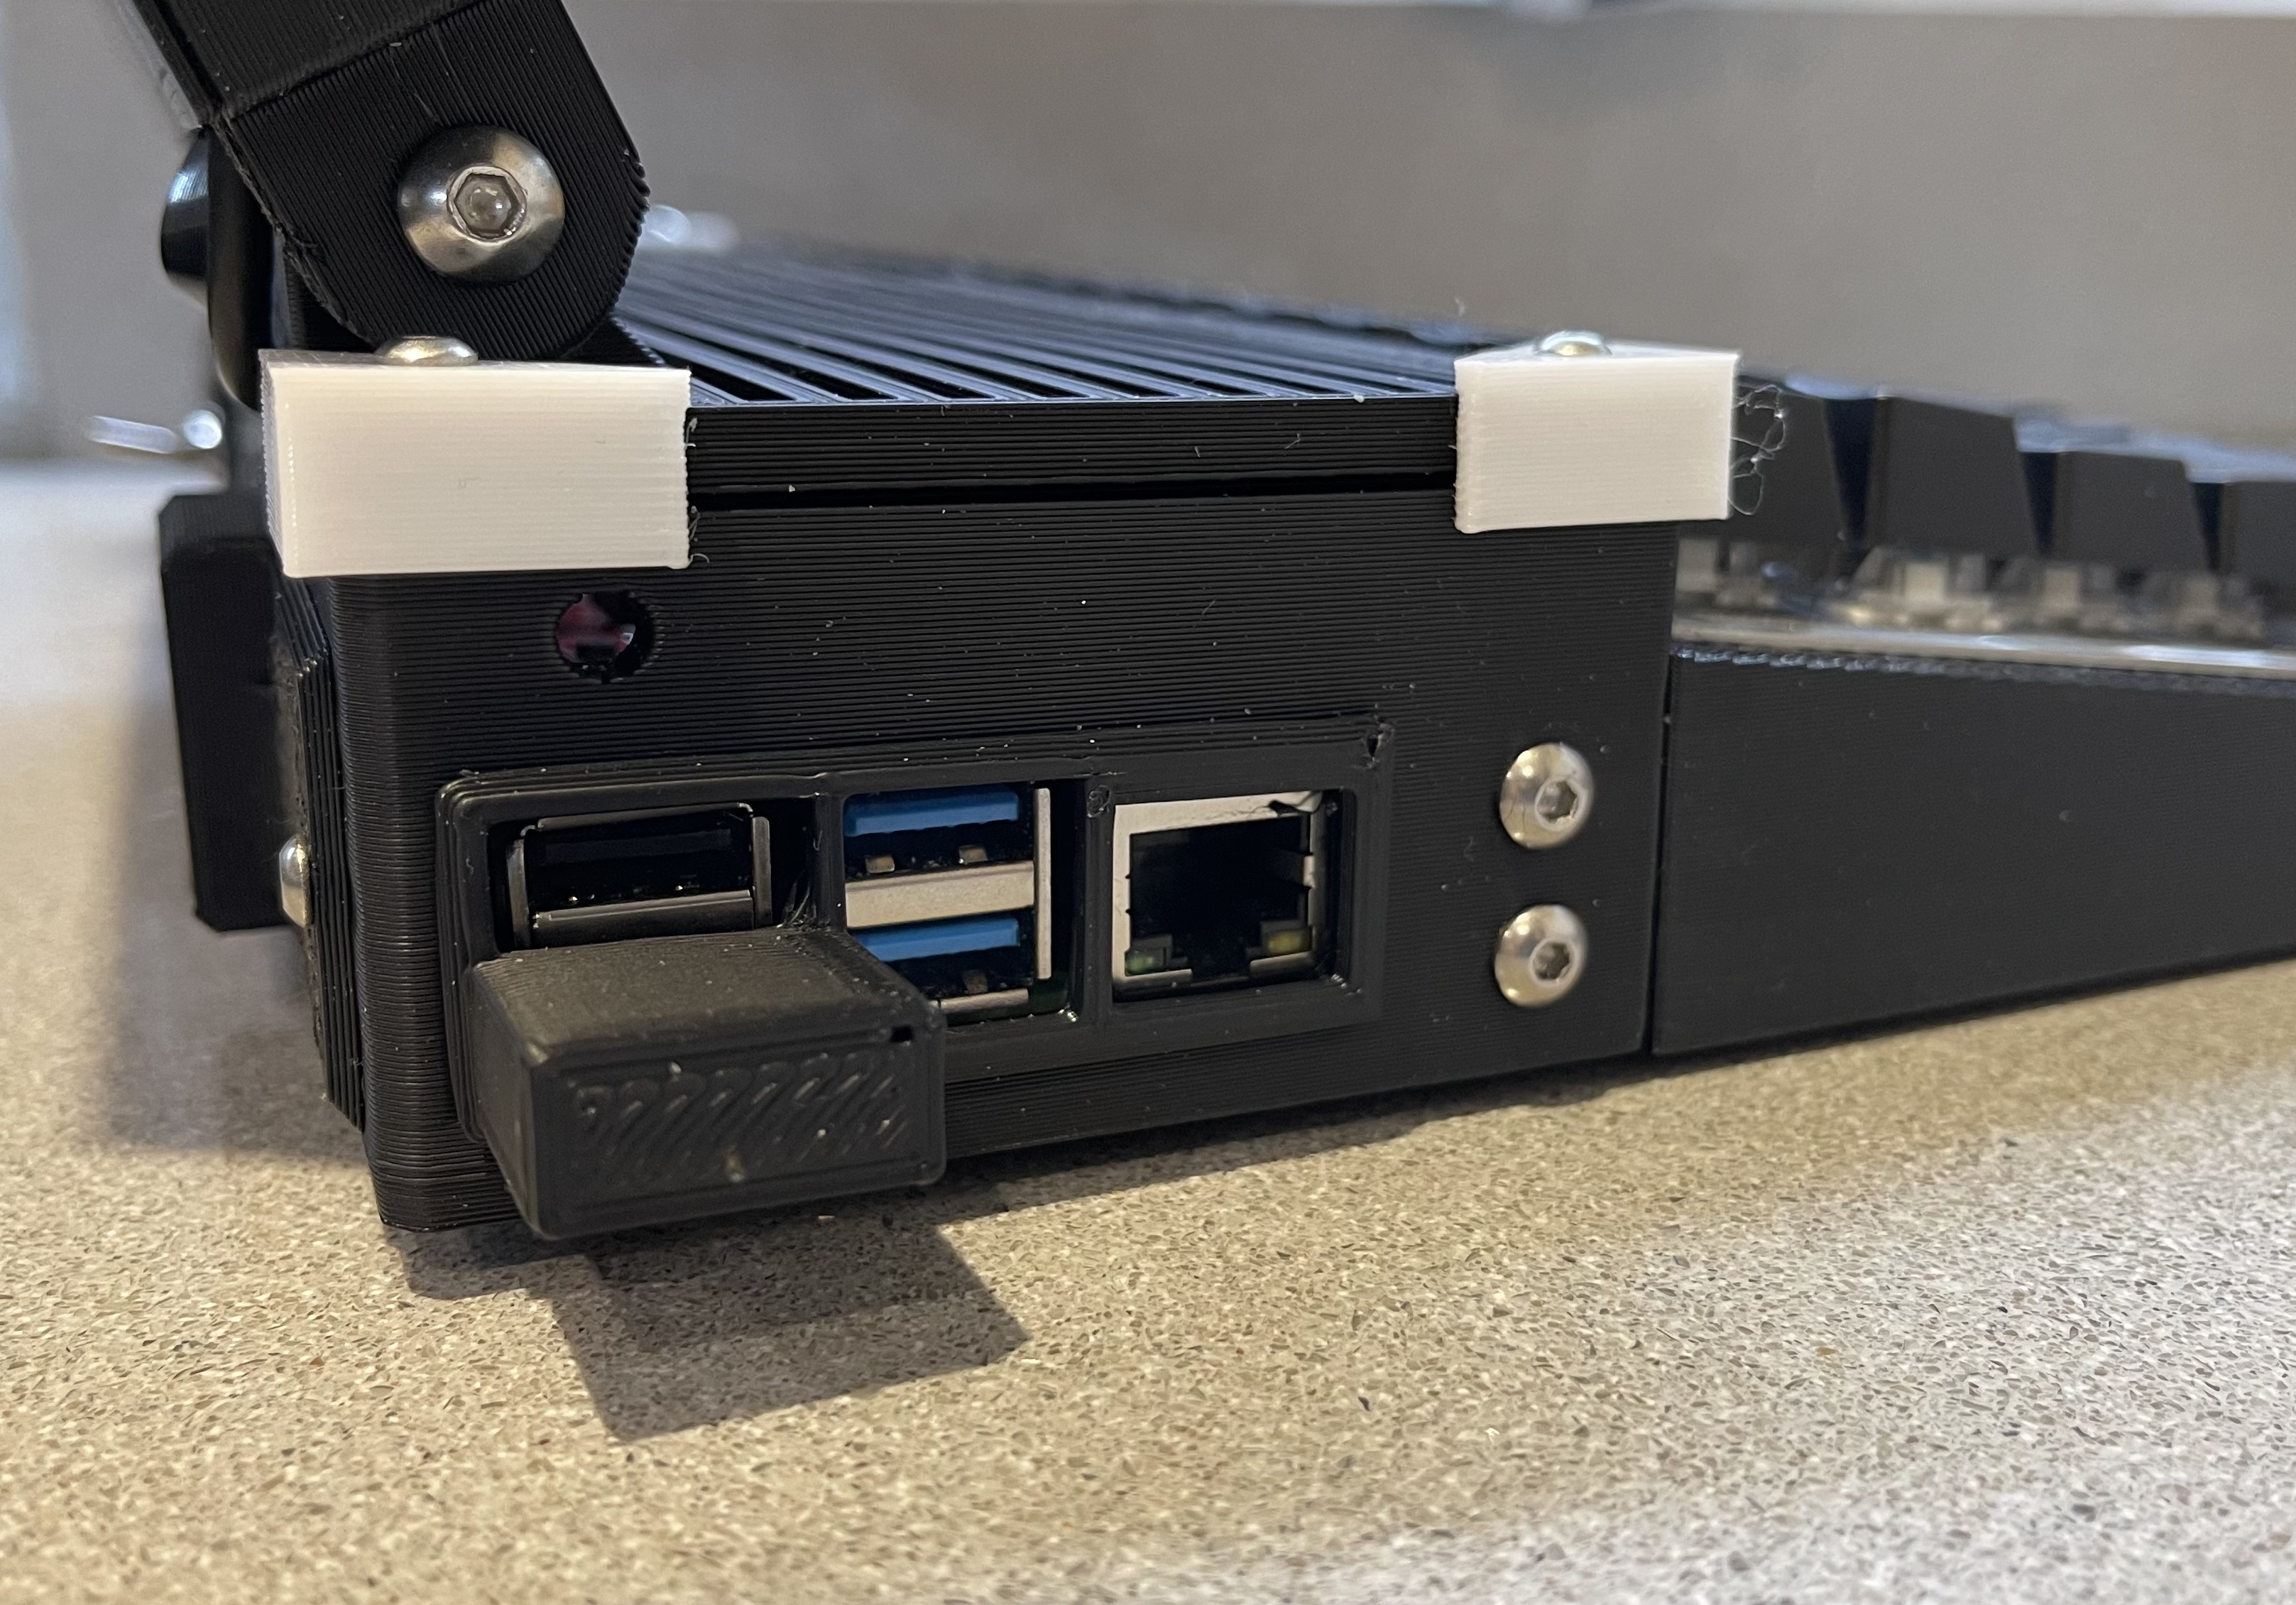
Not the most elegant, but it works
Connected to this hub is they keyboard, display and SDR. I made custom mini and micro USB to header cables to connect the various peripherals.
The SDR is a cheap RTL-SDR board I got from amazon, it has two RF inputs and is in a neat metal case to keep it isolated from other devices. It connects via mini USB to the internal hub
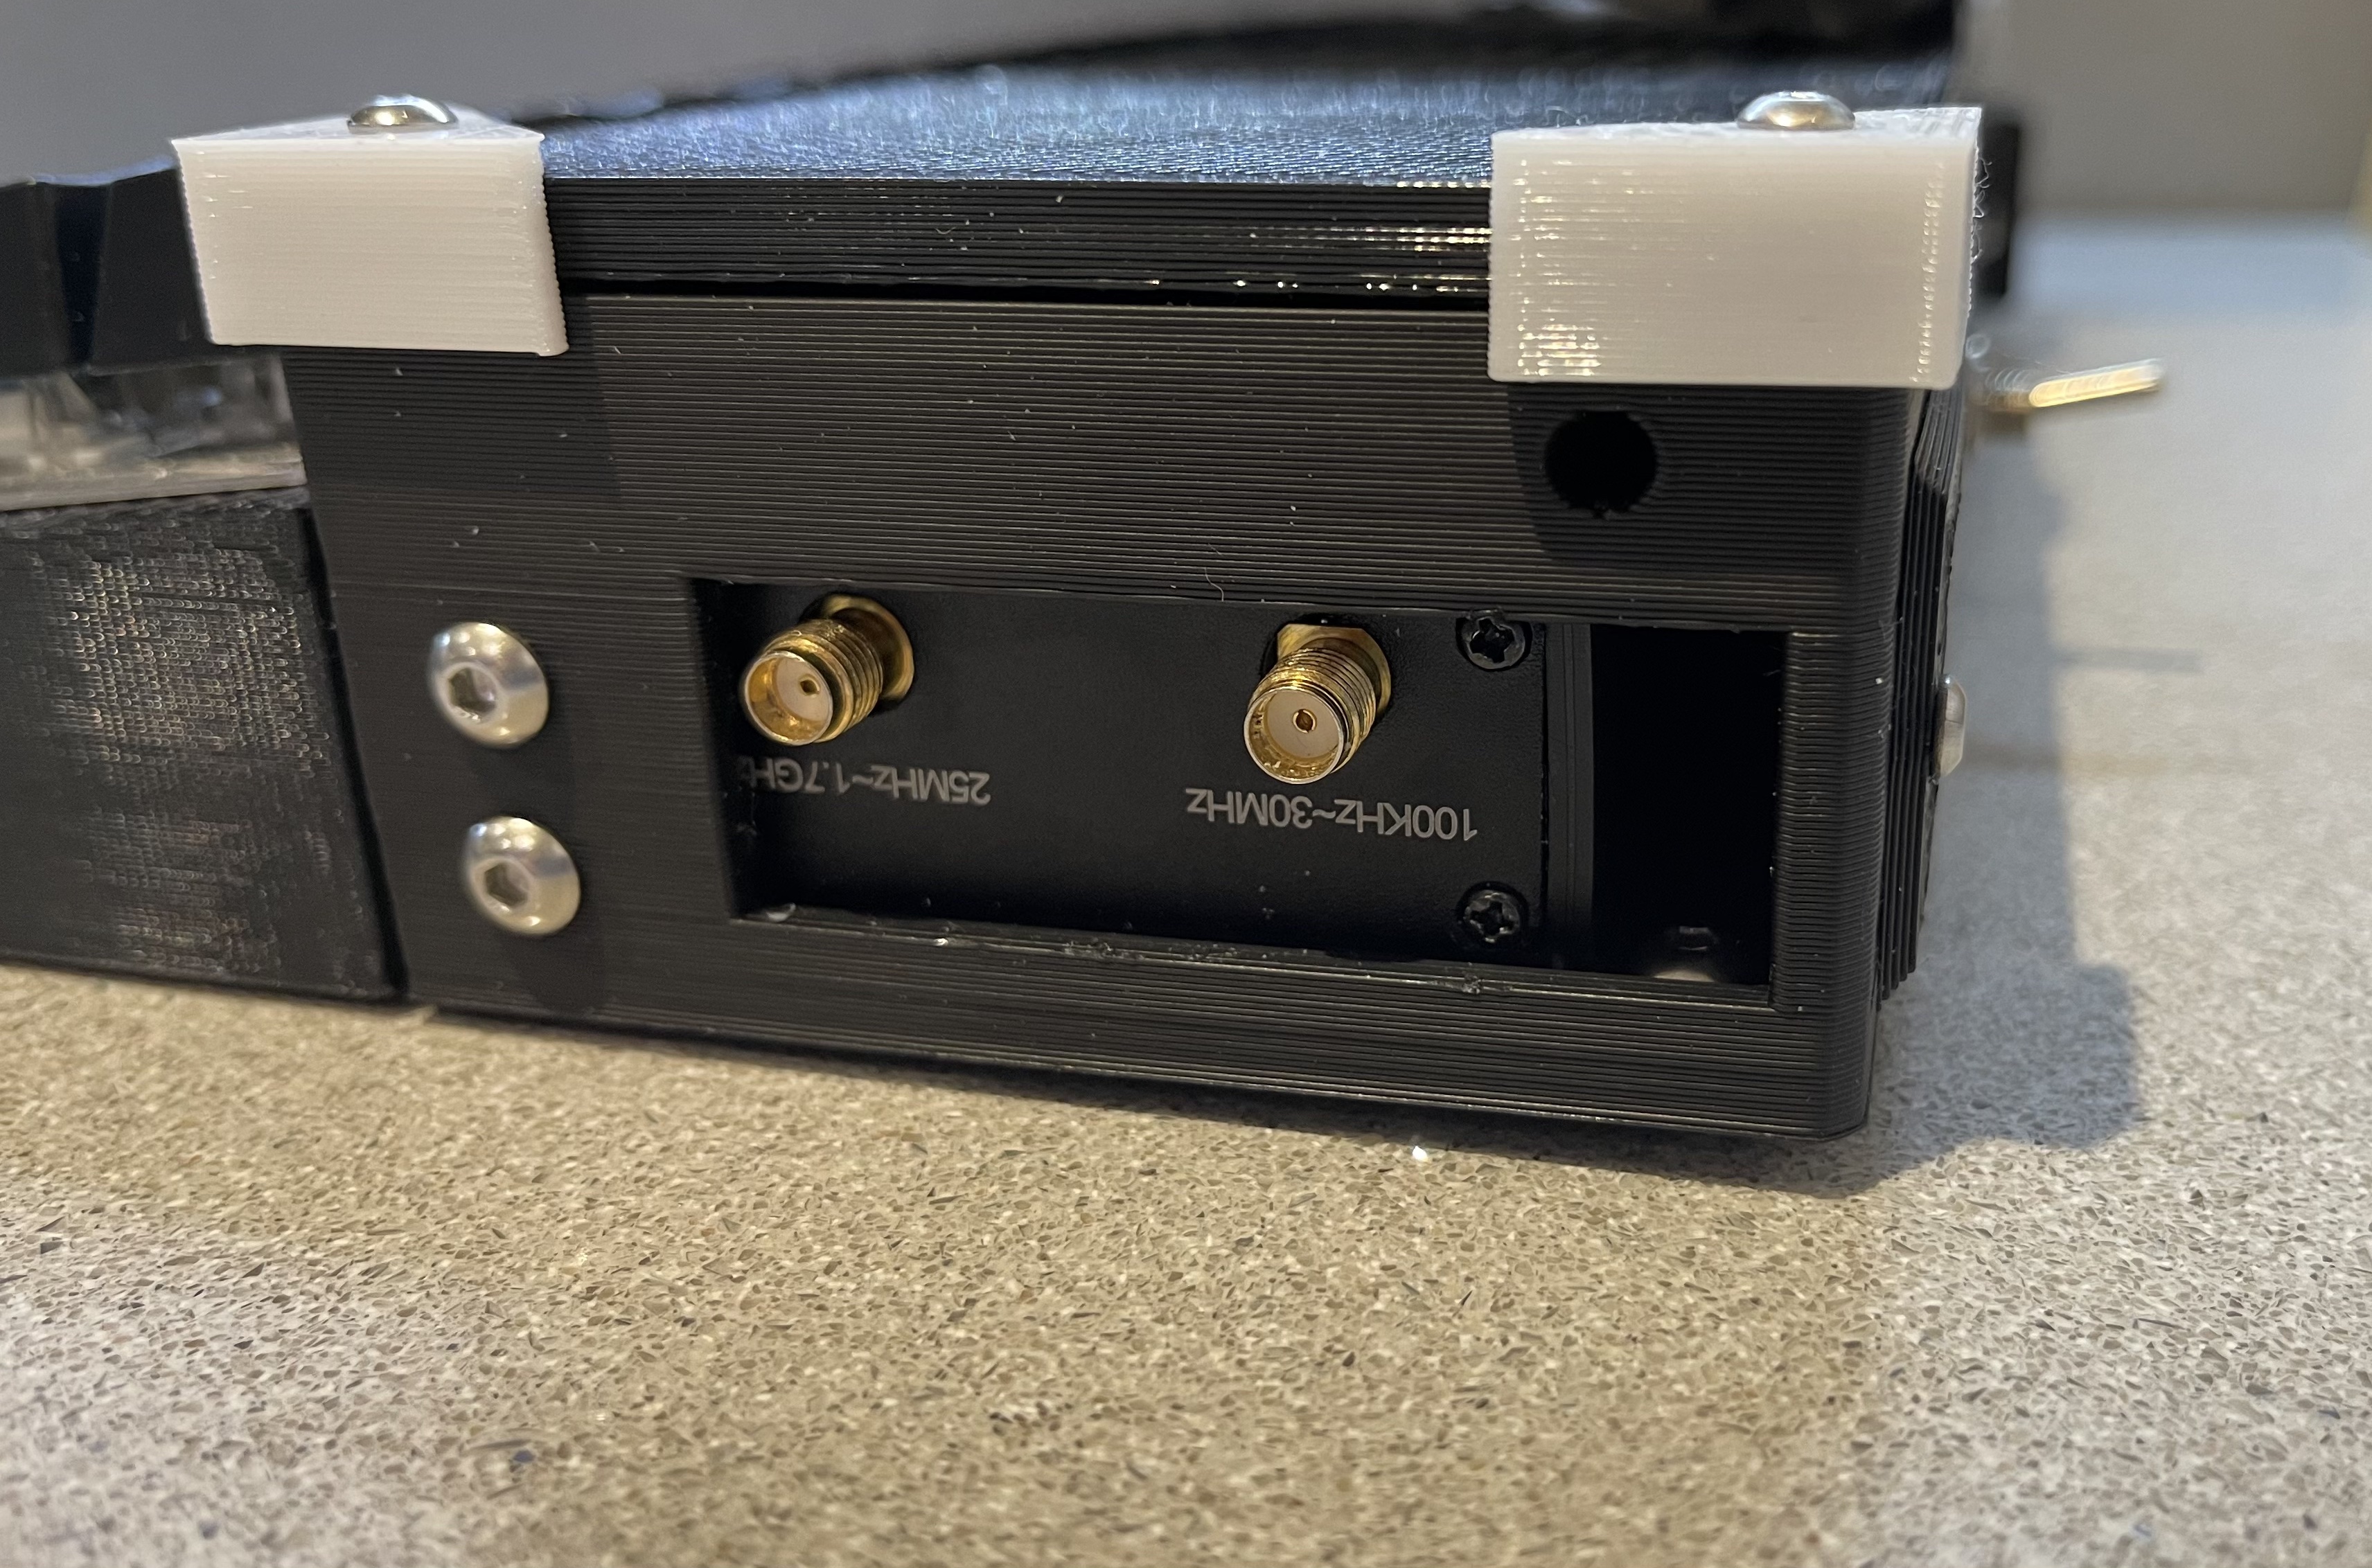
I did have a plate for this side, but it made using the RF connectors a pain
The keyboard is the same as used in previous attempts. It has ‘RGB’ lighting (not customisable sadly… I did have one that was but I managed to fry it 😢).
The RGB is actually kind of a pain, as it draws a lot of power and causes weirdness when the cyberdeck is booted without being plugged in to mains. I am likely to disable it (read: cut the power traces for it 😈) in future.
It is a fairly basic ‘cheap’ mechanical keyboard, but its actually not too bad to type on and its fits the aesthetic I was going for. It connects via mini-USB to the internal hub.

The keyboard in all its glory, and the official RPi mouse!
Finally, the display is a 7" IPS LCD. It has a resolution of 1024x600 and includes capacitive touch. It connects to the Pi via HDMI and the power and touchscreen via a micro USB cable. The cable is also spliced in to the UPSs’ 5v output as the screen draws a lot of current.
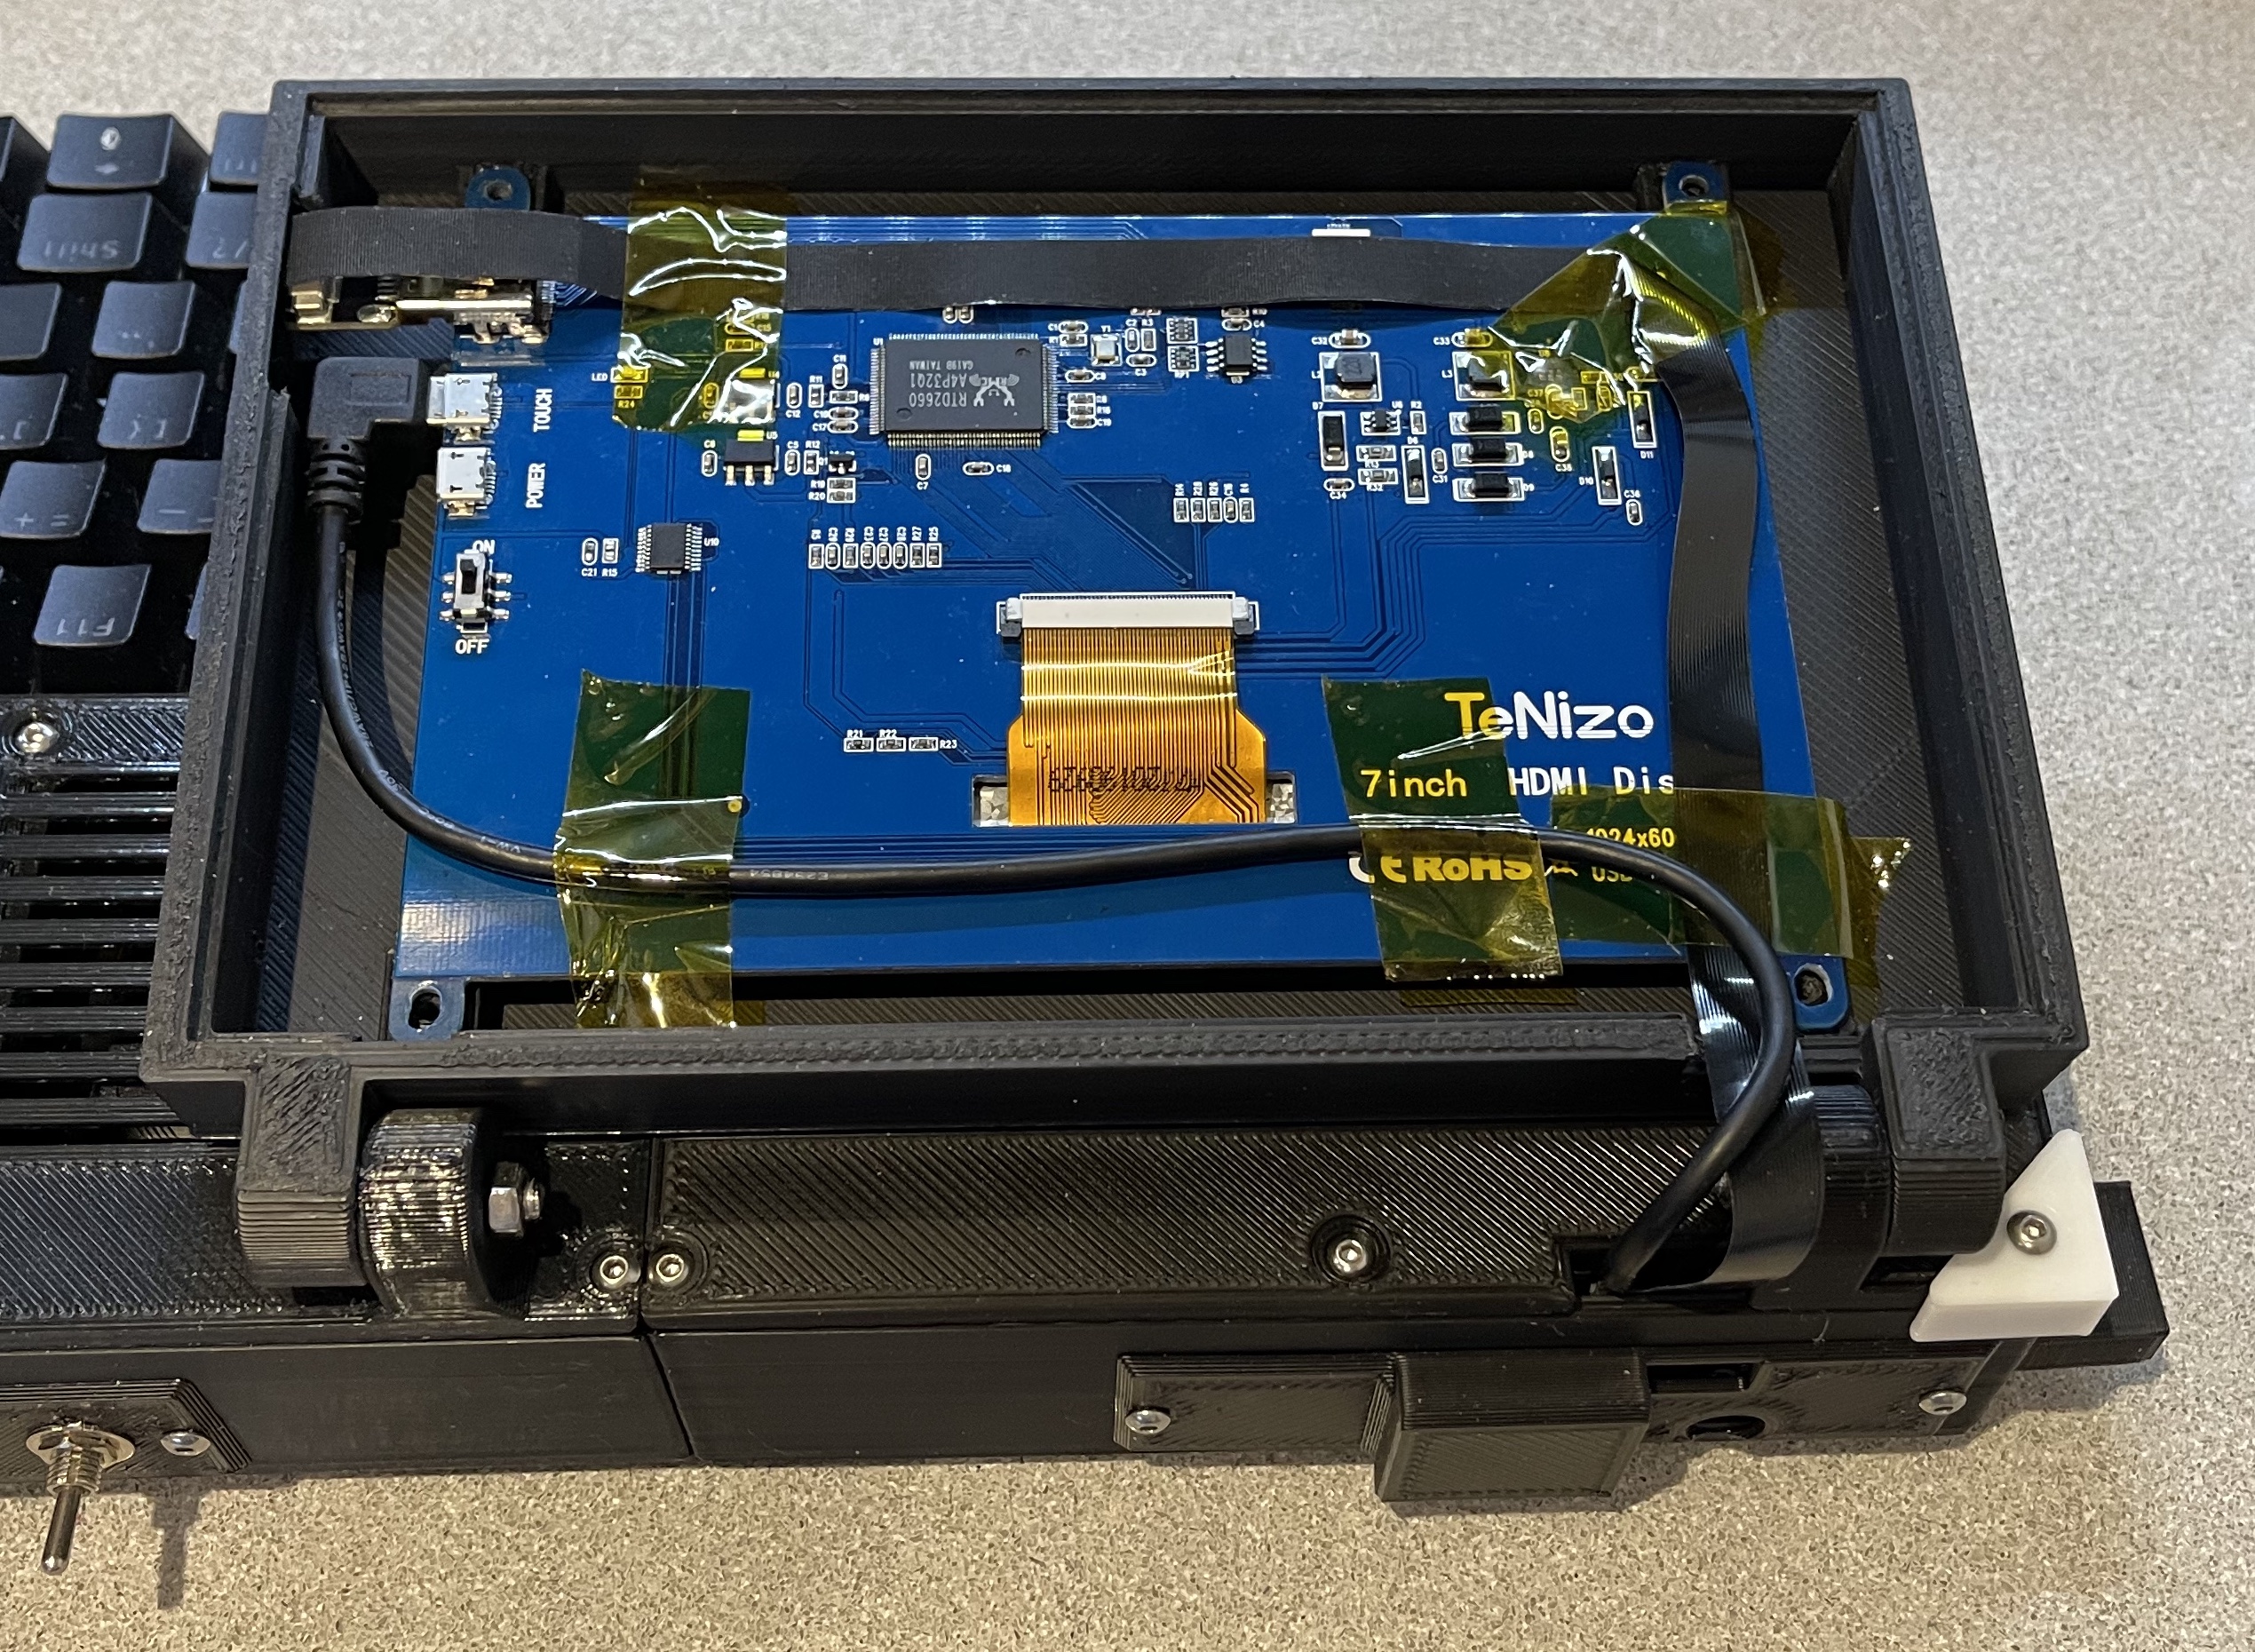
The display mounted on the cyberdeck
The display is connected via a ‘custom HDMI cable kit’ from The Pi Hut. It allows you to mix and match connectors for HDMI and uses a flex flat cable to go between them, quite useful for things like this.
There is a panel on the back of the unit to cover the connections, but leaving open the power input (on the UPS Board) and the 3.5mm audio jack
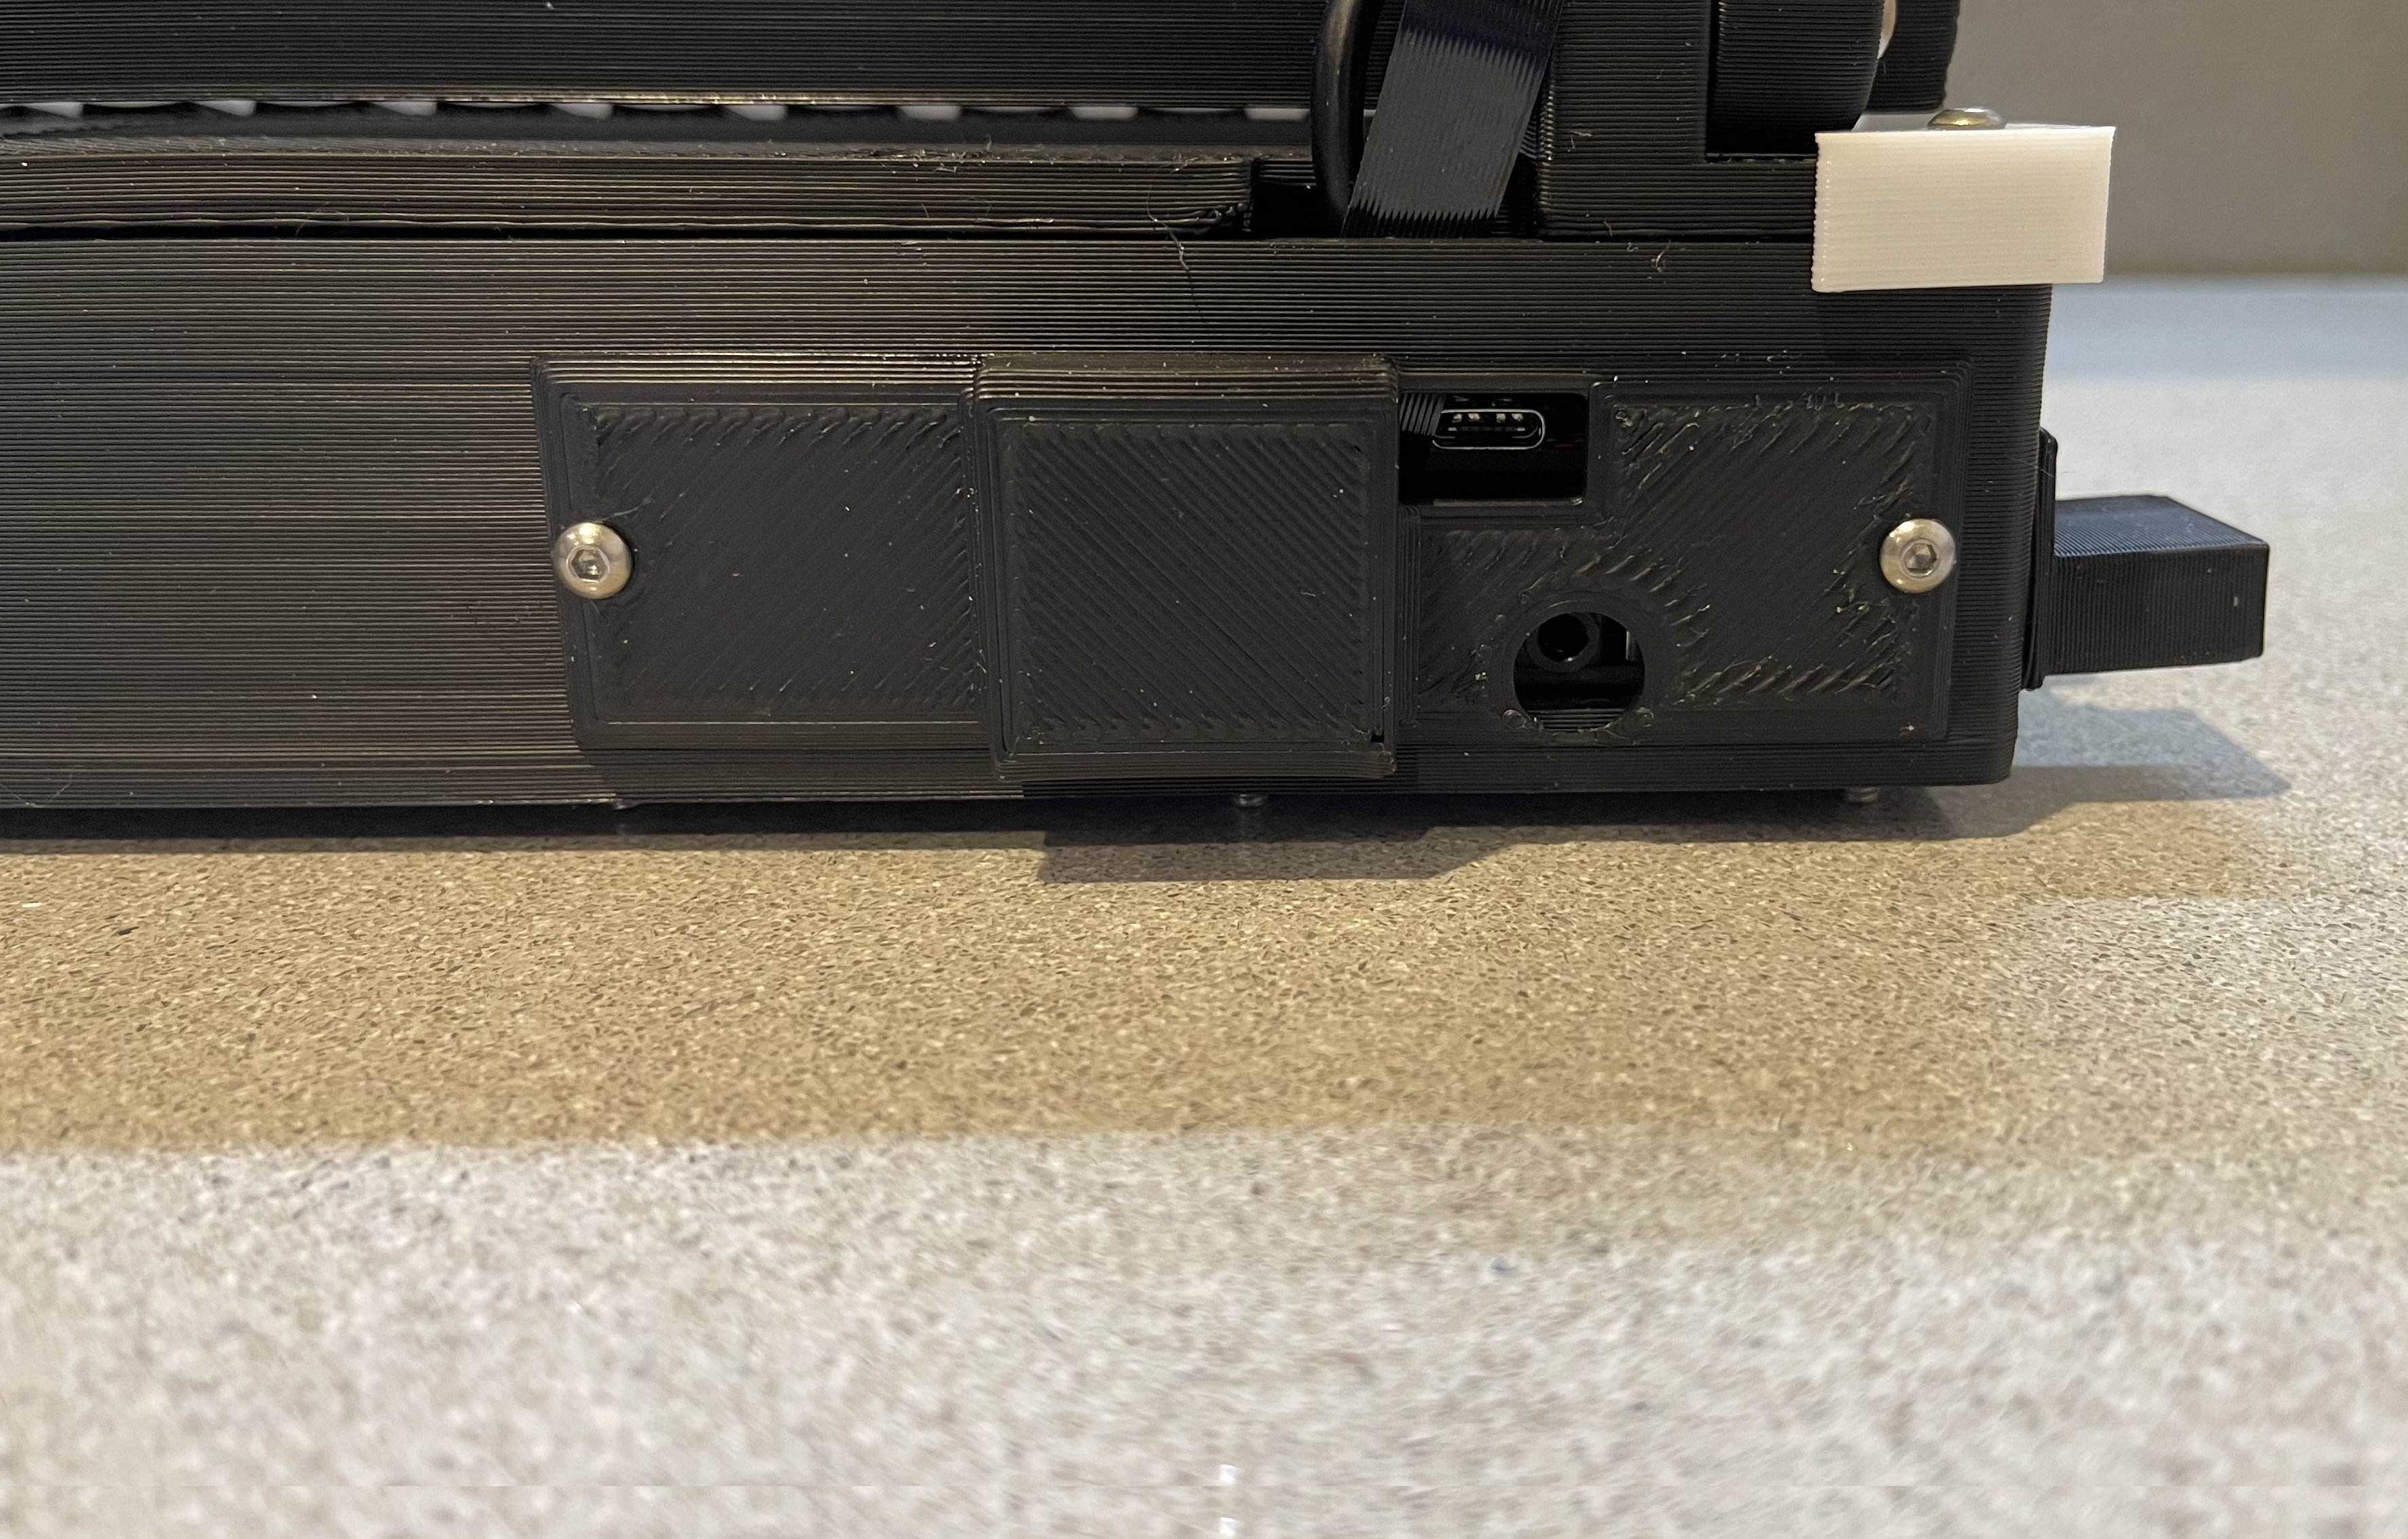
You can still access the ports you need to
That’s pretty much it for the hardware. It’s a standard Raspberry Pi 4. There are 2x USB3 ports accessable, 1x USB2 and 1x Gigabit Ethernet.
Bill Of Materials
Below is a pretty much complete list of the parts used and where I got them from. Prices are as at the time I purchased. You can likely find things cheaper on sites like Aliexpress, or you can even swap things out for other hardware.
| Device | Description | Cost/Vendor |
|---|---|---|
| Raspberry Pi 4 | 4Gb Model | £54 Pimoroni |
| UPSPack V3 | UPS & Battery | £25.99 Amazon |
| USB Hub | Internal USB Hub | £7.59 Amazon |
| AK33 | Mechanical Keyboard | £31.99 Amazon |
| SDR | KKMoon RTL-SDR | £32.99 Amazon |
| Display | 7" HDMI IPS Touchscreen | £28.05 Aliexpress |
| USB Cable | 2x 50cm Mini-USB Cables | £2.99 ea Amazon |
| USB Cable | 1x Right angle micro-USB Cables | £3.99 Amazon |
| HDMI Connector | Up angle micro HDMI Connector | £6 The Pi Hut |
| HDMI Connector | Standard HDMI Connector | £6 The Pi Hut |
| HDMI Cable | 50cm Flex Cable | £3 The Pi Hut |
| Dupont Connectors | 1550 pcs kit + Crimp Tool | £20.99 Amazon |
| Nuts & Bolts | 440 pcs kit | £15.99 Amazon |
Software
Right now, the deck is simply running Raspbian, with a few little tweaks to make things like the UPS and Display work correctly.
I might try out other distributions in the future, such as Kali Linux, but for now Raspbian is fine!
For a laugh, I installed steam link and had a go at playing Cyberpunk2077 on my cyberdeck. It worked surprisingly well, but I think I’d rather my 32" 1440p gaming monitor over a 7" 600p display running at 30Hz
Click the thumbnail to see the video
Display
The display ‘works’ out of the box as its a simple HDMI display, and the touch drivers are included in Raspbian, so the only thing I needed to do was set some config to have it run at its native resolution. I used the guide from Adafruit here, but the TL;DR is:
add the below lines to /boot/config.txt and reboot.
hdmi_group=2
hdmi_mode=1
hdmi_mode=87
hdmi_cvt=1024 600 60 3 0 0 0
UPS
The UPS also ‘works’ but requires some config changes if you want to be able to see the data over serial, or have the Pi shutdown automatically. They are details in the documentation here.
You will need to download the scripts they provide if you want a nice way to view the UPS details, but if like me you just need to get the data flowing (I plan to build my own software to show battery status) then add the below to your /boot/config.txt and reboot.
enable_uart=1
dtoverlay=disable-bt
Once you’ve done that, you’ll be able to see the data on /dev/ttyAMA0 at 9600baud.
Inspiration, and why would I want to do this?
Like a lot of hardware projects, its better to ask… why not?
There are plenty of practical reasons you might want to build your own cyberdeck… maybe you want something portable for ‘hacking in the field’, something that contains the exact hardware you need for that… such as a built in SDR like my deck has.
But largely, at least for me, I built one because I wanted to. The first deck I remember seeing that made me think about building my own was the ‘Off-Grid cyberdeck’ by back7. I saw it browsing hackday a few years ago and loved the idea of a portable pi, with custom hardware (e.g the GPIO ports and network switch in back7’s deck.
There was also decks like ‘The Virtuscope’ and this awesome NUC based deck. Sites like they cyberdeck cafe and the cyberdeck subreddit are full of inspiring builds.
More generally, the whole ‘cyberpunk’ / ‘retrowave’ / ‘retro-future’ aesthetic is something that appeales to me.
So will I used this deck for anything? Maybe, maybe not. Did I enjoy building it? Certainly, and that’s really all that matters.
Conclusion
This current iteration of my cyberdeck is one I am finally ‘happy’ with. It’s definitely not perfect, and no doubt I will change and improve the design in the future. But I have enjoyed building it, and hopefully given you some inspiration to build one yourself.
If you want to build your own, the STL files are available on thingiverse here, and you can use the above table for the hardware you’ll need.
If you can think of ways to improve my design, or this has inspired you to create your own I’d love to hear about them, you can send me a tweet @mickwheelz_!

